Maackia 007: Fall, foundation repair, and visualizing garden designs
Hi! I’m Nathan Langley and this is Maackia, a monthly newsletter on garden design. It’s finally fall, which is easily my favourite time of the year! The temperatures are just right, the day has an obvious flow to it, and the lower sun in the sky highlights the wonderful colours surrounding us.

There have been many ups and downs with the foundation repair project around my garage. As with lots of home repair projects, the more I dug, the worse things got. Luckily (haha!?) things have deteriorated so much on the main northern wall that a structural engineer’s services have been called into action. No more digging for me! Whether the problem gets addressed before winter is anyone’s guess, but at least there is a plan forward to address the issue. The last thing I want to deal with is an imploding garage that takes half of the house with it.
On a more positive note, I will probably create a garden that is somewhat connected to the current mess. The downspout that is causing the issue on the northern corner of the garage handles half of the runoff from the house, and it spits it all out onto the gravel driveway. Initially, it only discharged the water a few feet away from the foundation – now it is approximately ten feet away. But the water still ends up flowing down the driveway and stops where there is a bit of a dip before connecting to the road. Naturally, it collects there, creating puddles that you have to drive through. I would like to change this.
To do so, I will install a small French drain to move the water away from the driveway. The regraded French drain will carry the water across the guest parking area and will flow into a rain garden where it can collect and infiltrate within 24 hours. I won’t have time to create the garden before the snow begins to fall (the first hard frost was this past week), but I am aiming to have the French drain completed. Then I can chip away at planning the garden over the winter and build it sometime in May or early June after the ground thaws out.
Before I found myself digging trenches by hand last month, I started creating videos for YouTube. I have only made two so far, but watching them afterwards made something shockingly clear: visualizing a garden design is difficult. Planting plans are a strange thing to look at if you are not familiar with them, and they don’t really help you imagine what the garden will look like. They are useful for figuring out spacing, but the overall visual flow of a garden and how it feels is equally important and should be a primary consideration when planning something new. Assessing these characteristics is difficult to do with only a plan view drawing.
In school, we relied heavily on perspective drawings done by hand or using a 3D rendering program. I was terrible at creating these drawings (and still am). I’m not an artist and have no formal training. My guess: they probably won’t be of much help to you as you plan your garden either…
My other hangup with perspective drawings (particularly rendered ones) is that they can create false expectations from the gardens being created. Expectations that often can’t be met, particularly while the garden is establishing. This is due to several reasons, the most basic being gardens are not static like buildings or products you buy at a store – they are alive and have a mind of their own. You can make an educated guess how a garden is going to look when it is mature, but chances are at least one part of it will be different from what you planned. This is a distinct challenge for garden designers who are trying to sell their ideas to clients – they almost have to promise the world even though they know things will probably turn out differently than what they said they would. Luckily for you, you don’t have to sell yourself on your ideas!
Instead of relying on visual representations like perspective drawings, I like to take a more functional and basic approach. The first drawing that I make use of when designing a garden is still, unfortunately, a plan view. But the one you might not know about is called an elevation drawing. Think of it as an extension of a plan view drawing but instead of depicting space between plants, it shows heights (see the ‘Overview’ drawing in the recipe below for an example). Their other main benefit is that you are more likely to understand an elevation drawing because you are looking at the space in a way that is more natural, and this, in turn, helps to visualize everything else.
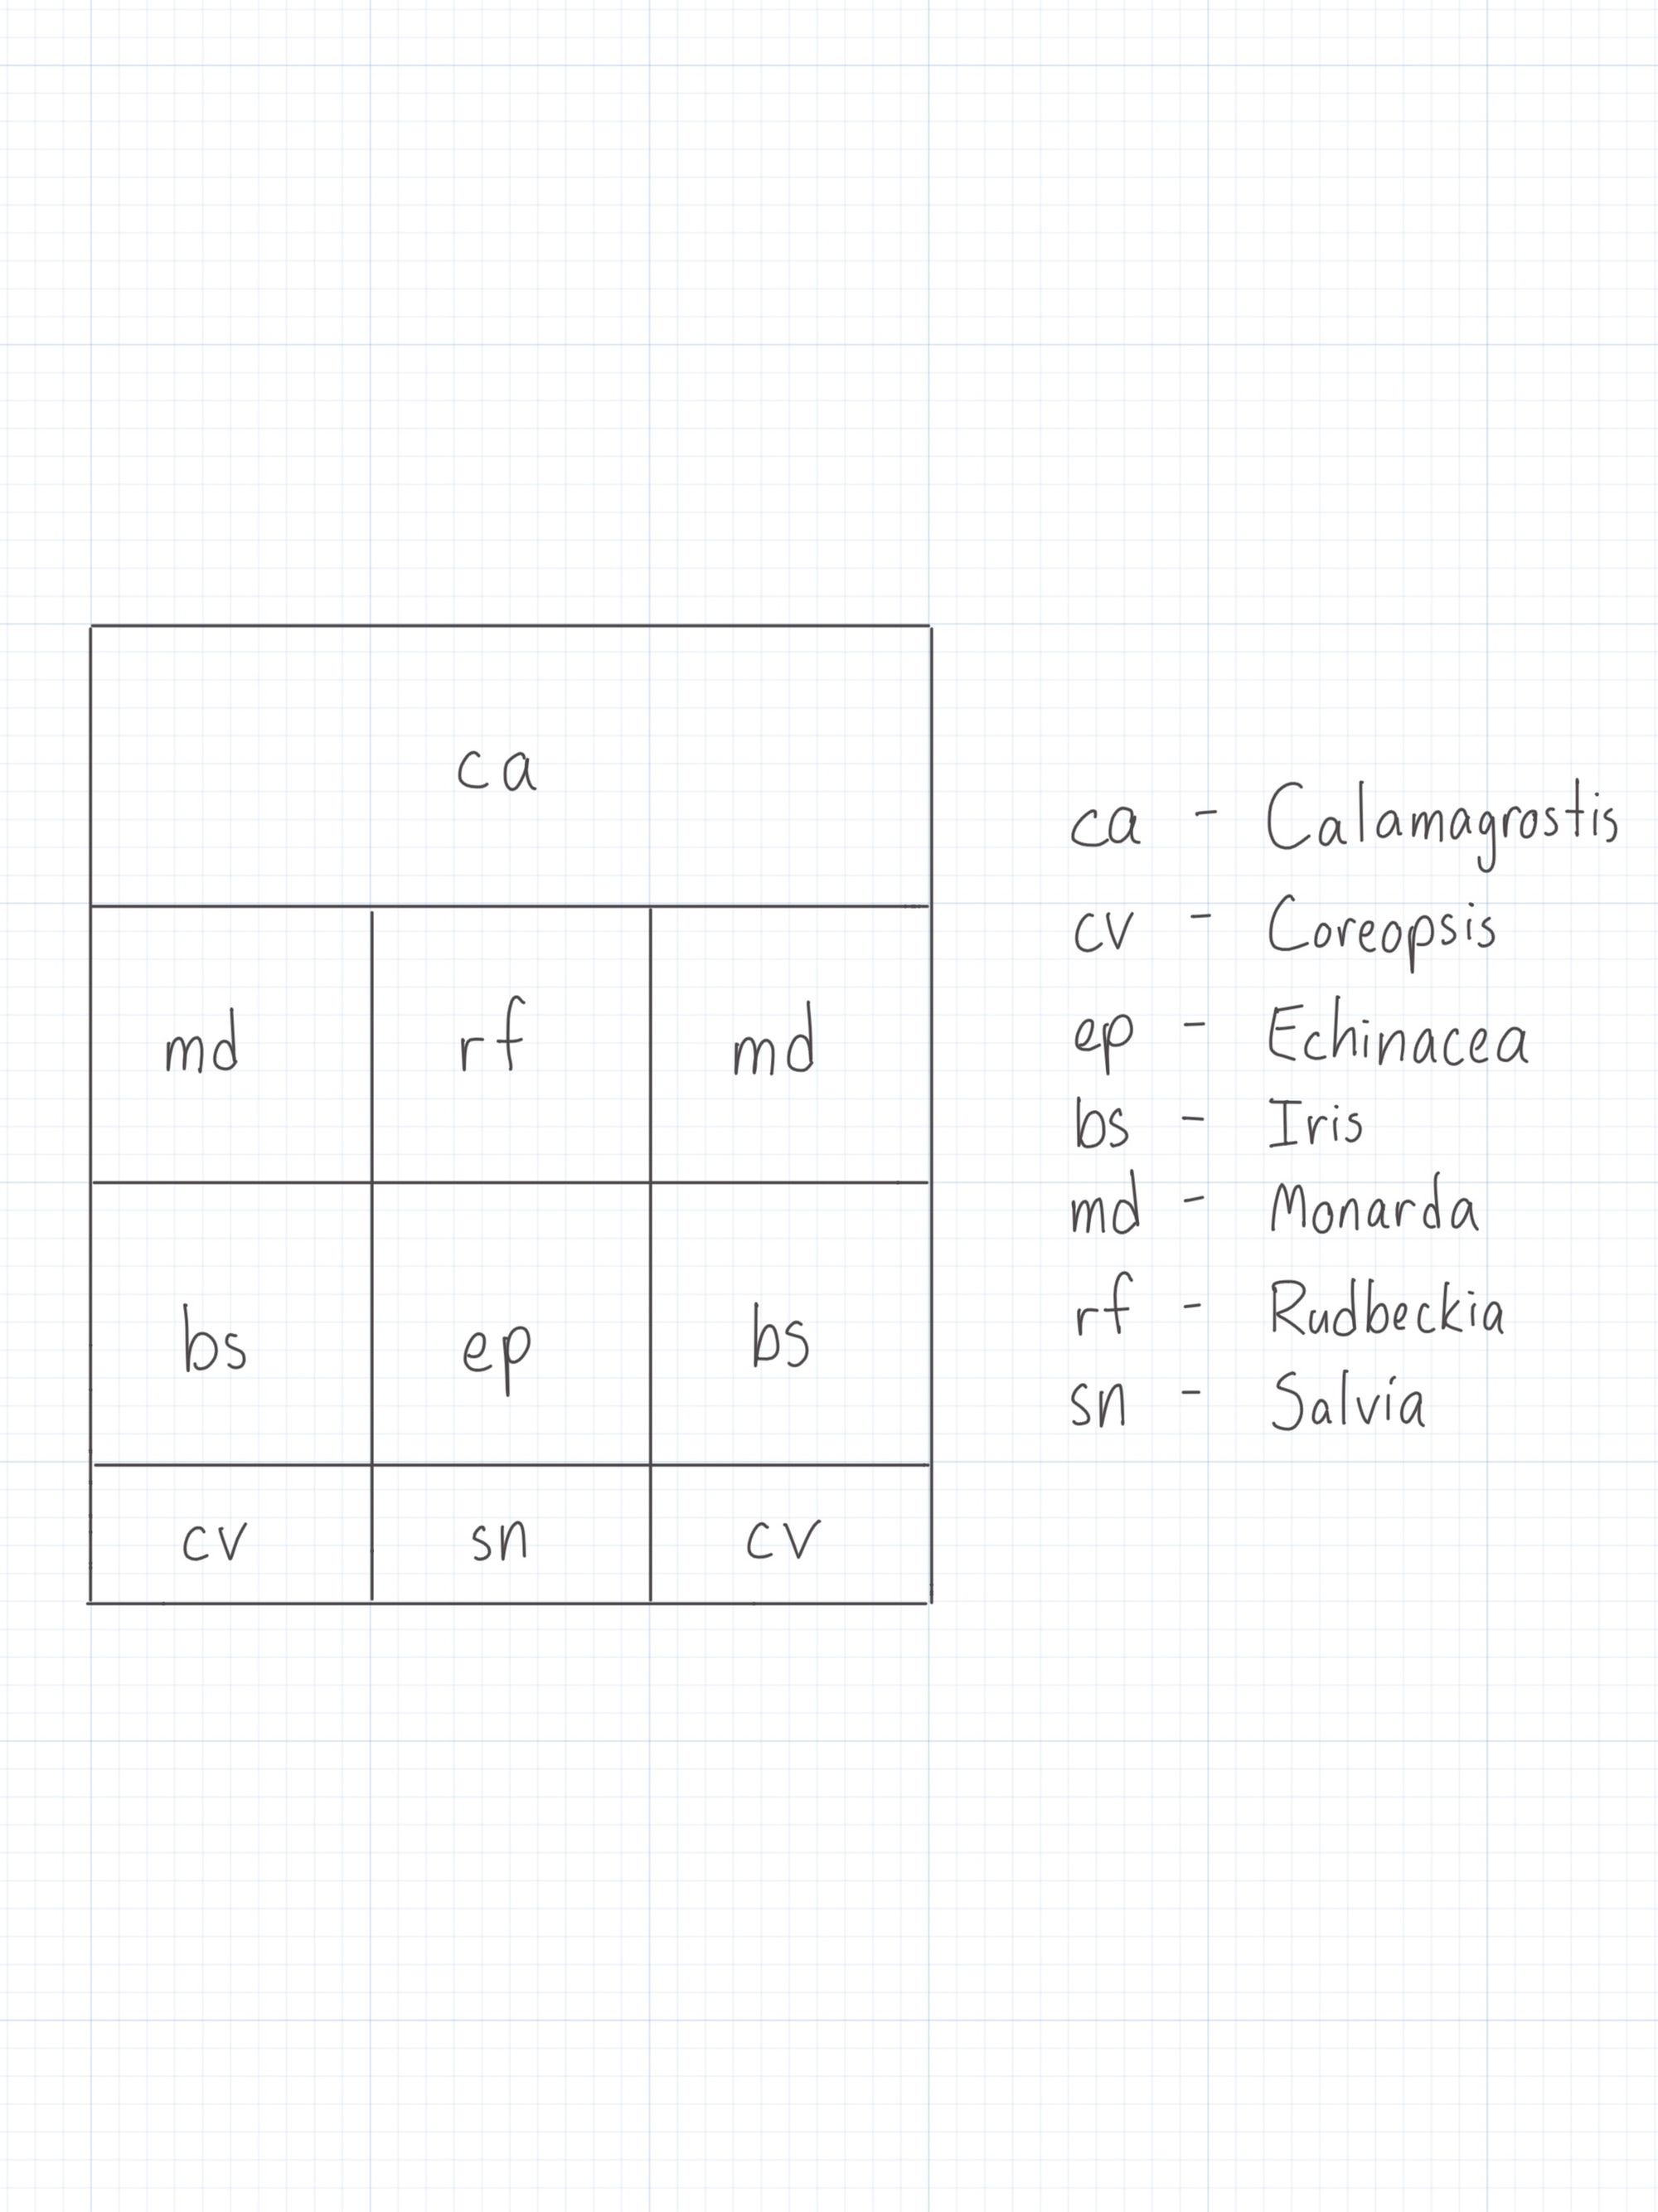
It is also fairly easy to produce an elevation drawing once you have a planting plan sketched out on graph paper. You just have to extrapolate what you have already drawn in the planting plan and add in heights. When I am doing this, I don’t draw specific plant details – I rely on photographs for that information. Instead, I draw simple blocks that are coloured in different shades of grey (dark grey for plants in the foreground, changing to lighter shades of grey as you move to plants in the background).
The nice thing about these drawings is that they are quick to produce, so you can make a number of them for different times of the year. You can also colour them to mimic what each plant’s flower colour will be, or if you are artistically inclined, you can draw representations of each plant within the blocks. It’s really up to you.
Again, I find these drawings useful in assessing a garden’s visual flow and the relationship between neighbouring plants. It becomes obvious if the heights of certain plants don’t fit with what you had in mind, or the plants used don’t lead the eye in the way you intended. If you find something you don’t like, return to the plan view drawing and sketch out a different idea. Once done, create another elevation drawing to see if the new idea solves your problem. Rinse and repeat until you have something you are satisfied with. Have fun!
the recipe
The Classic
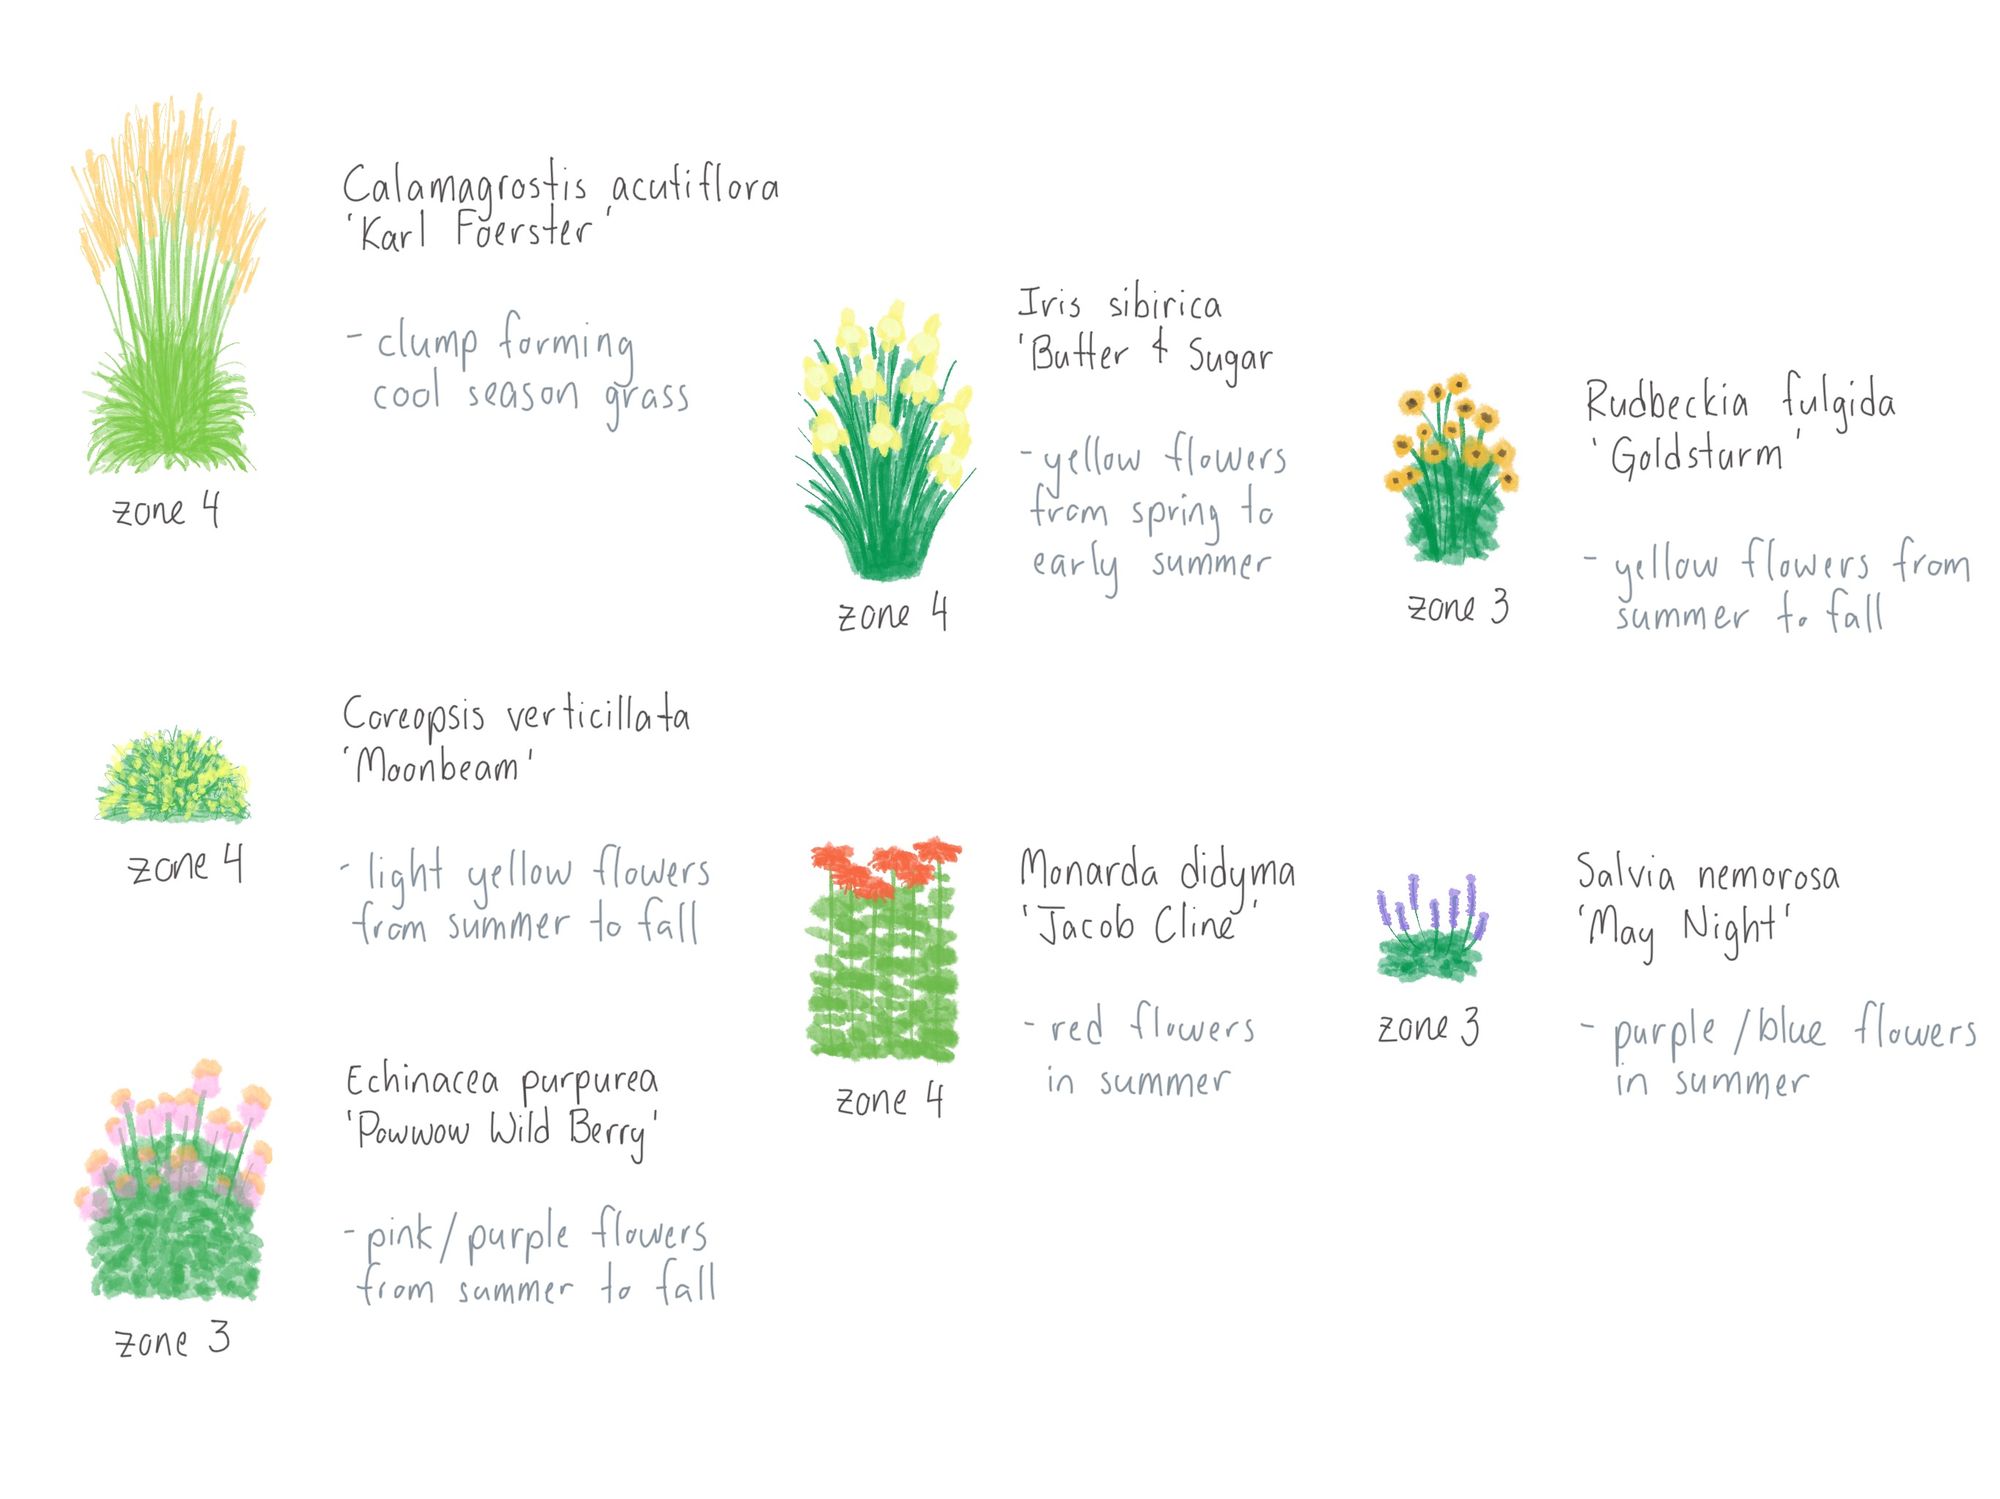
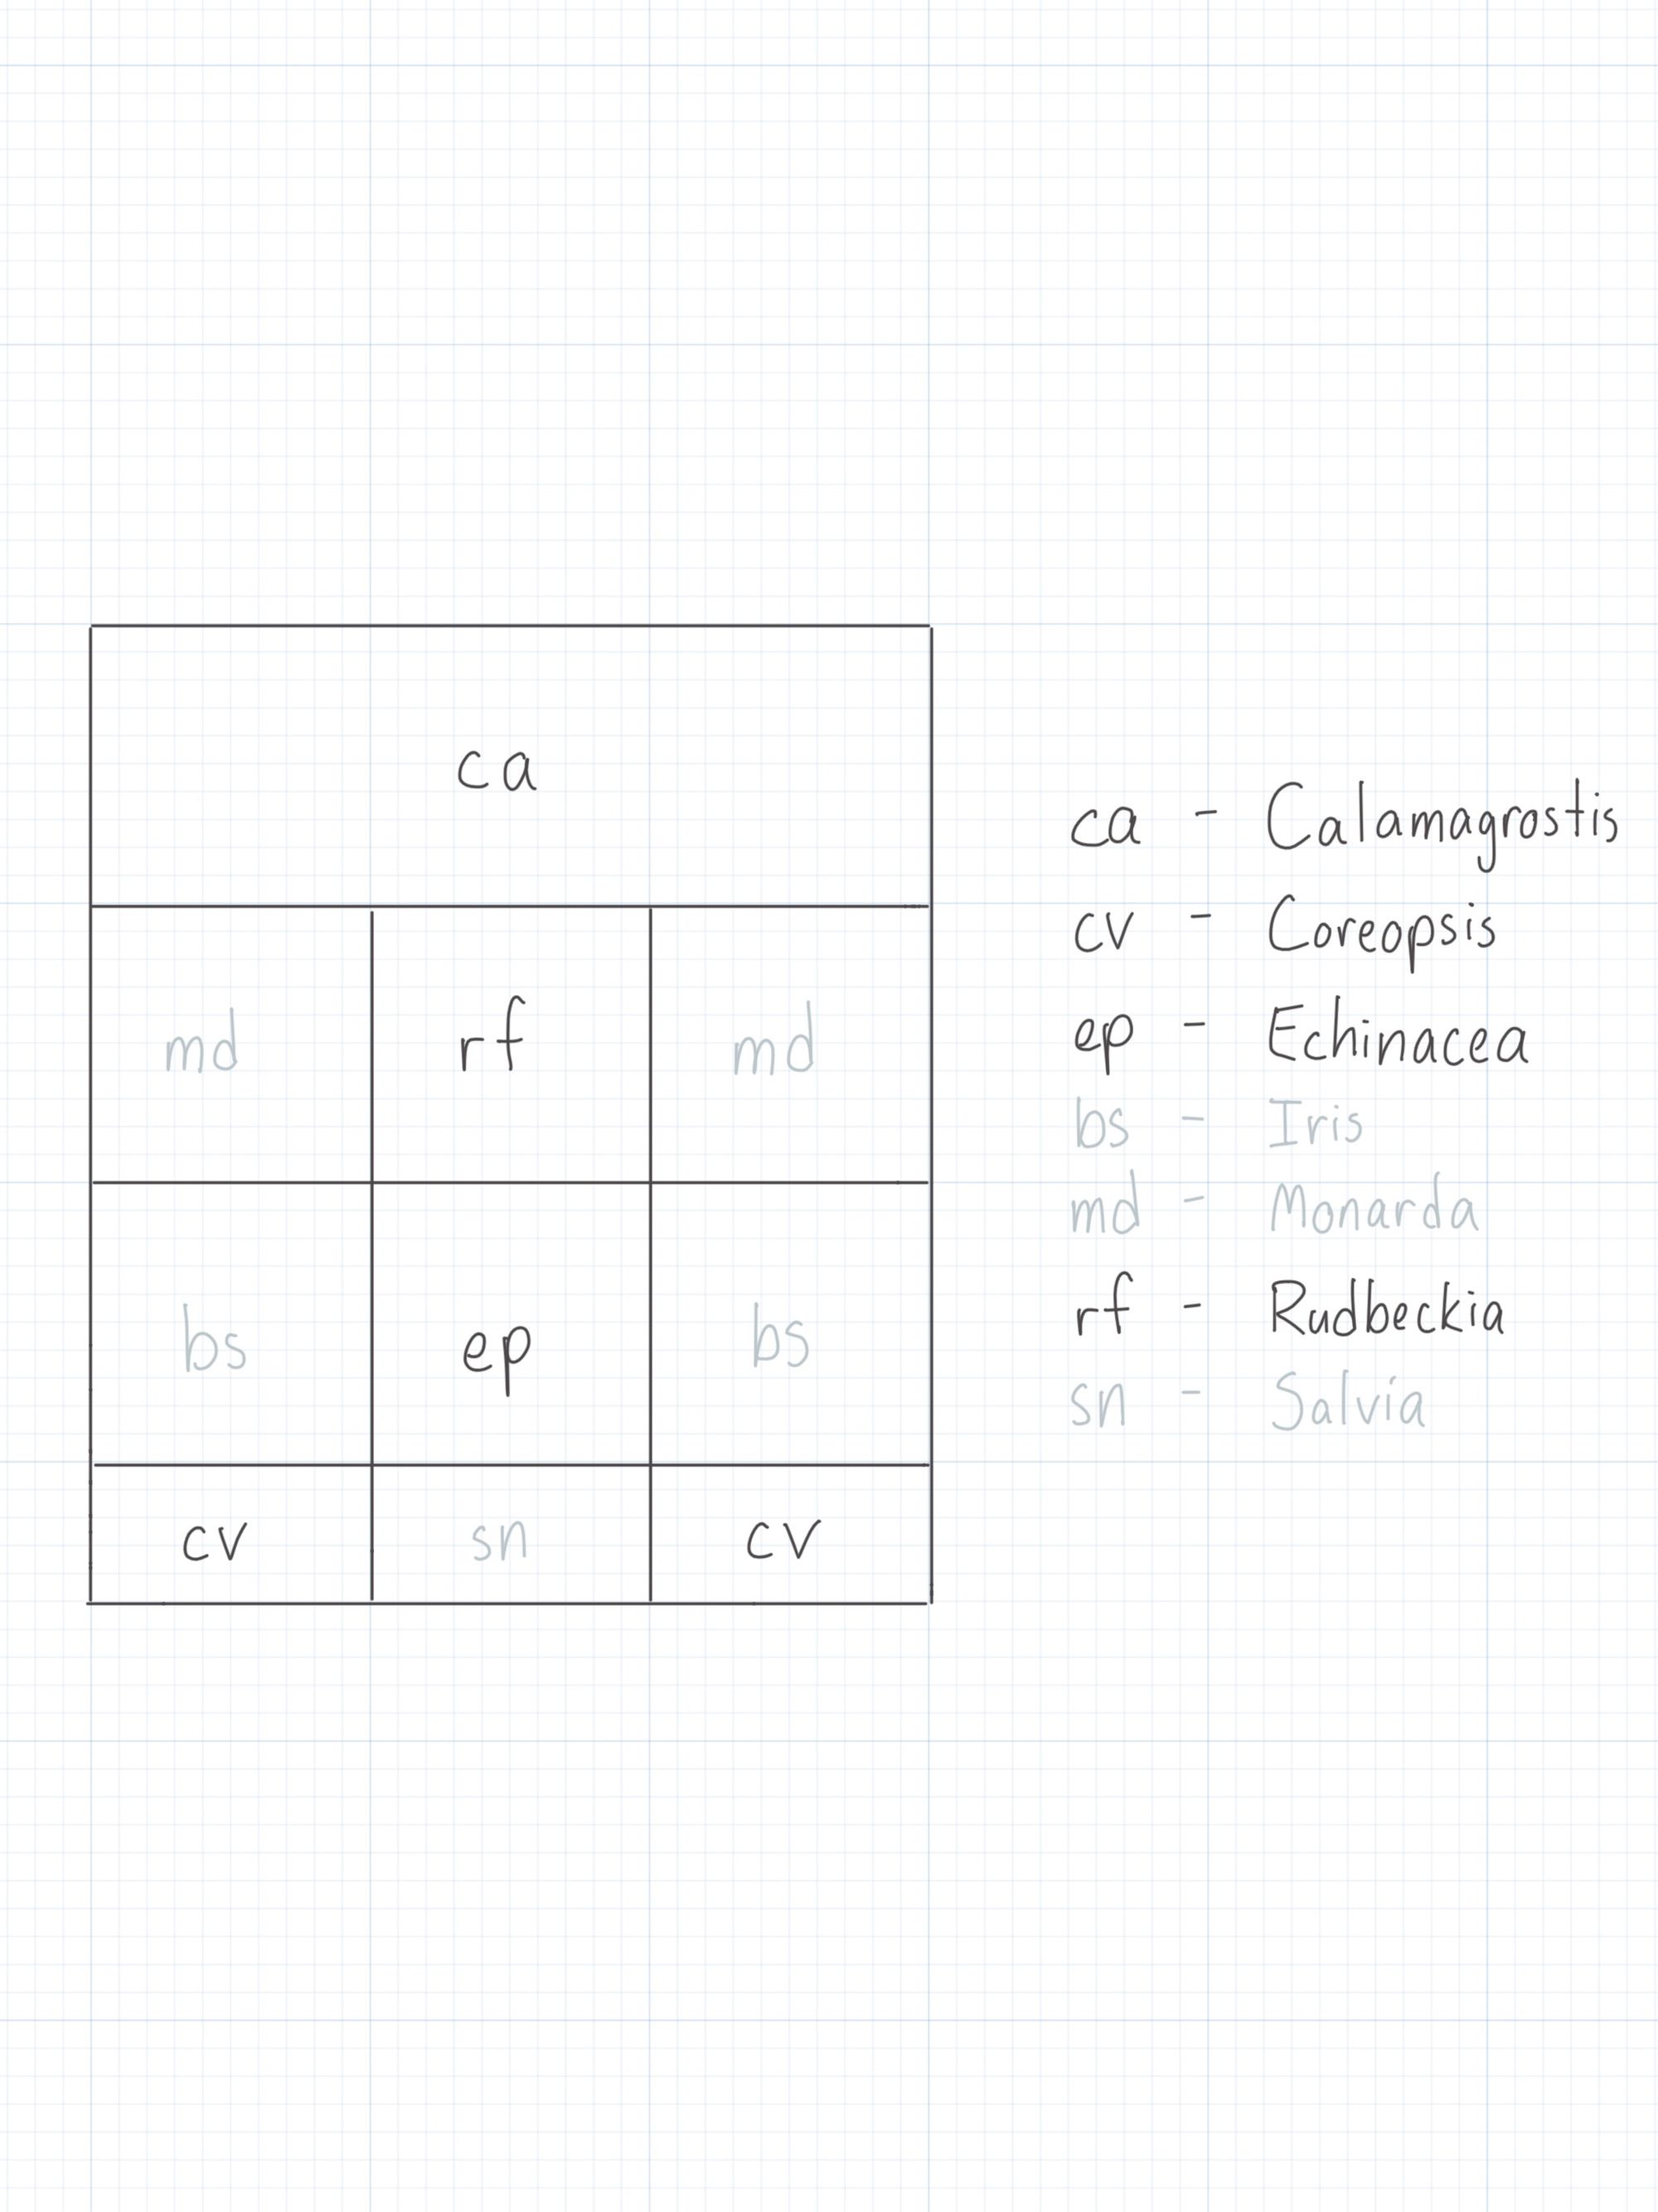
This month’s recipe is my take on a staple garden I see in Sudbury. It is typically employed in a foundation bed, particularly under a bay window or next to a main entrance. The garden doesn’t have much spring interest, but that can be easily rectified with some bulb plantings in between the perennials. It doesn’t ask much of you in terms of maintenance, but it does provide a lot of visual impact in the summer and fall months. All the plants used are tough and grow well in all but the coldest climates. However, I would lean towards planting the Echinacea in larger numbers than you otherwise probably would. They can be somewhat temperamental while they establish.
Ingredients:

Seasons:
Overview

Spring
Spring will mostly show signs of life with this garden and not much colour (yet). Calamagrostis acutiflora ‘Karl Foerster’ will carry a lot of visual weight, while Iris sibirica ‘Butter and Sugar’ will add a splash of delicate colour while you wait for the other perennials to wake up.

Summer
In early summer, Iris sibirica ‘Butter and Sugar’ will fade and make way for the other flowering perennials. Coreopsis verticillata ‘Moonbeam’ will provide plentiful, airy feeling flowers, while Echinacea purpurea ‘Powwow Wild Berry’, Monarda didyma ‘Jacob Cline’, and Rudbeckia fulgida ‘Goldsturm’ vie for attention. Meanwhile, Salvia nemorosa ‘May Night’ will provide a splash of contrast both in colour and in form.

Fall
As fall settles in, the garden will become more laid back. Dried Calamagrostis tips will catch the falling light, while Coreopsis verticillata ‘Moonbeam’, Echinacea purpurea ‘Powwow Wild Berry’, and Rudbeckia fulgida ‘Goldsturm’ will display the typical fall tones with blacks, browns, and yellows dancing with early morning frost.
