Maackia 013: Water, water, everywhere!
Happy spring! I’m Nathan Langley and this is Maackia, a monthly newsletter on drainage!

While the snow was melting (it’s all gone now!) I took a little stroll through the property to see how things were draining. With all the heat arriving suddenly, I thought it would be an opportune time to assess some of my recent changes. If you would like a visual aide, have a look at the video here.
I am glad to say that most of the last-minute additions and fill that I placed in late November worked. The main negative was that the downspout on the garage needed a heat trace line (I ran out of time before the snow stuck). Luckily, the buildup of ice only lasted a week or so before it opened up again. All the other downspouts seemed to remain functional. More importantly, my little swale off the garage downspout worked perfectly when a large rainstorm rolled through the area this past week. The end of the swale overflowed due to the volume of rain, but I can adjust the layout to accommodate more volume. It was a short-term problem though — the water infiltrated quickly once the heavy rain stopped, confirming my earlier infiltration tests.

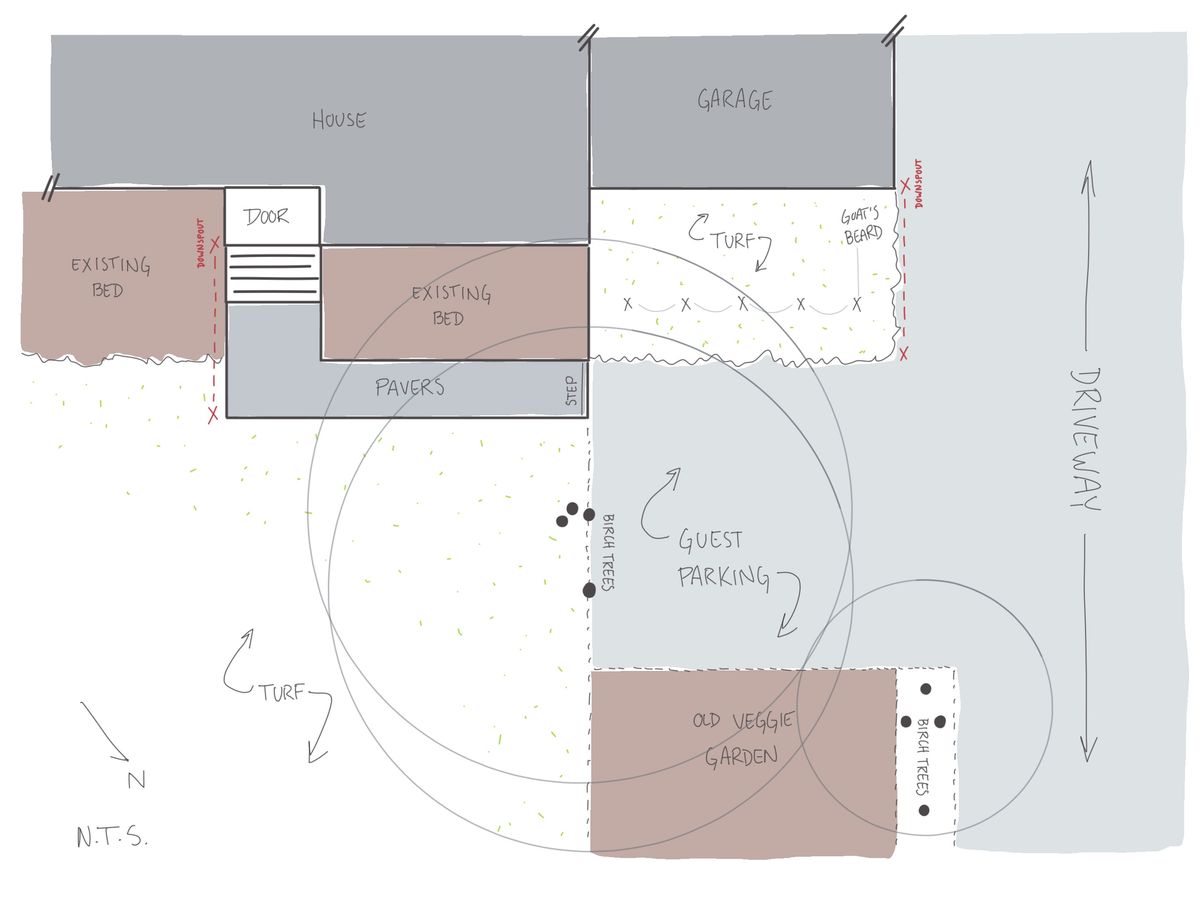
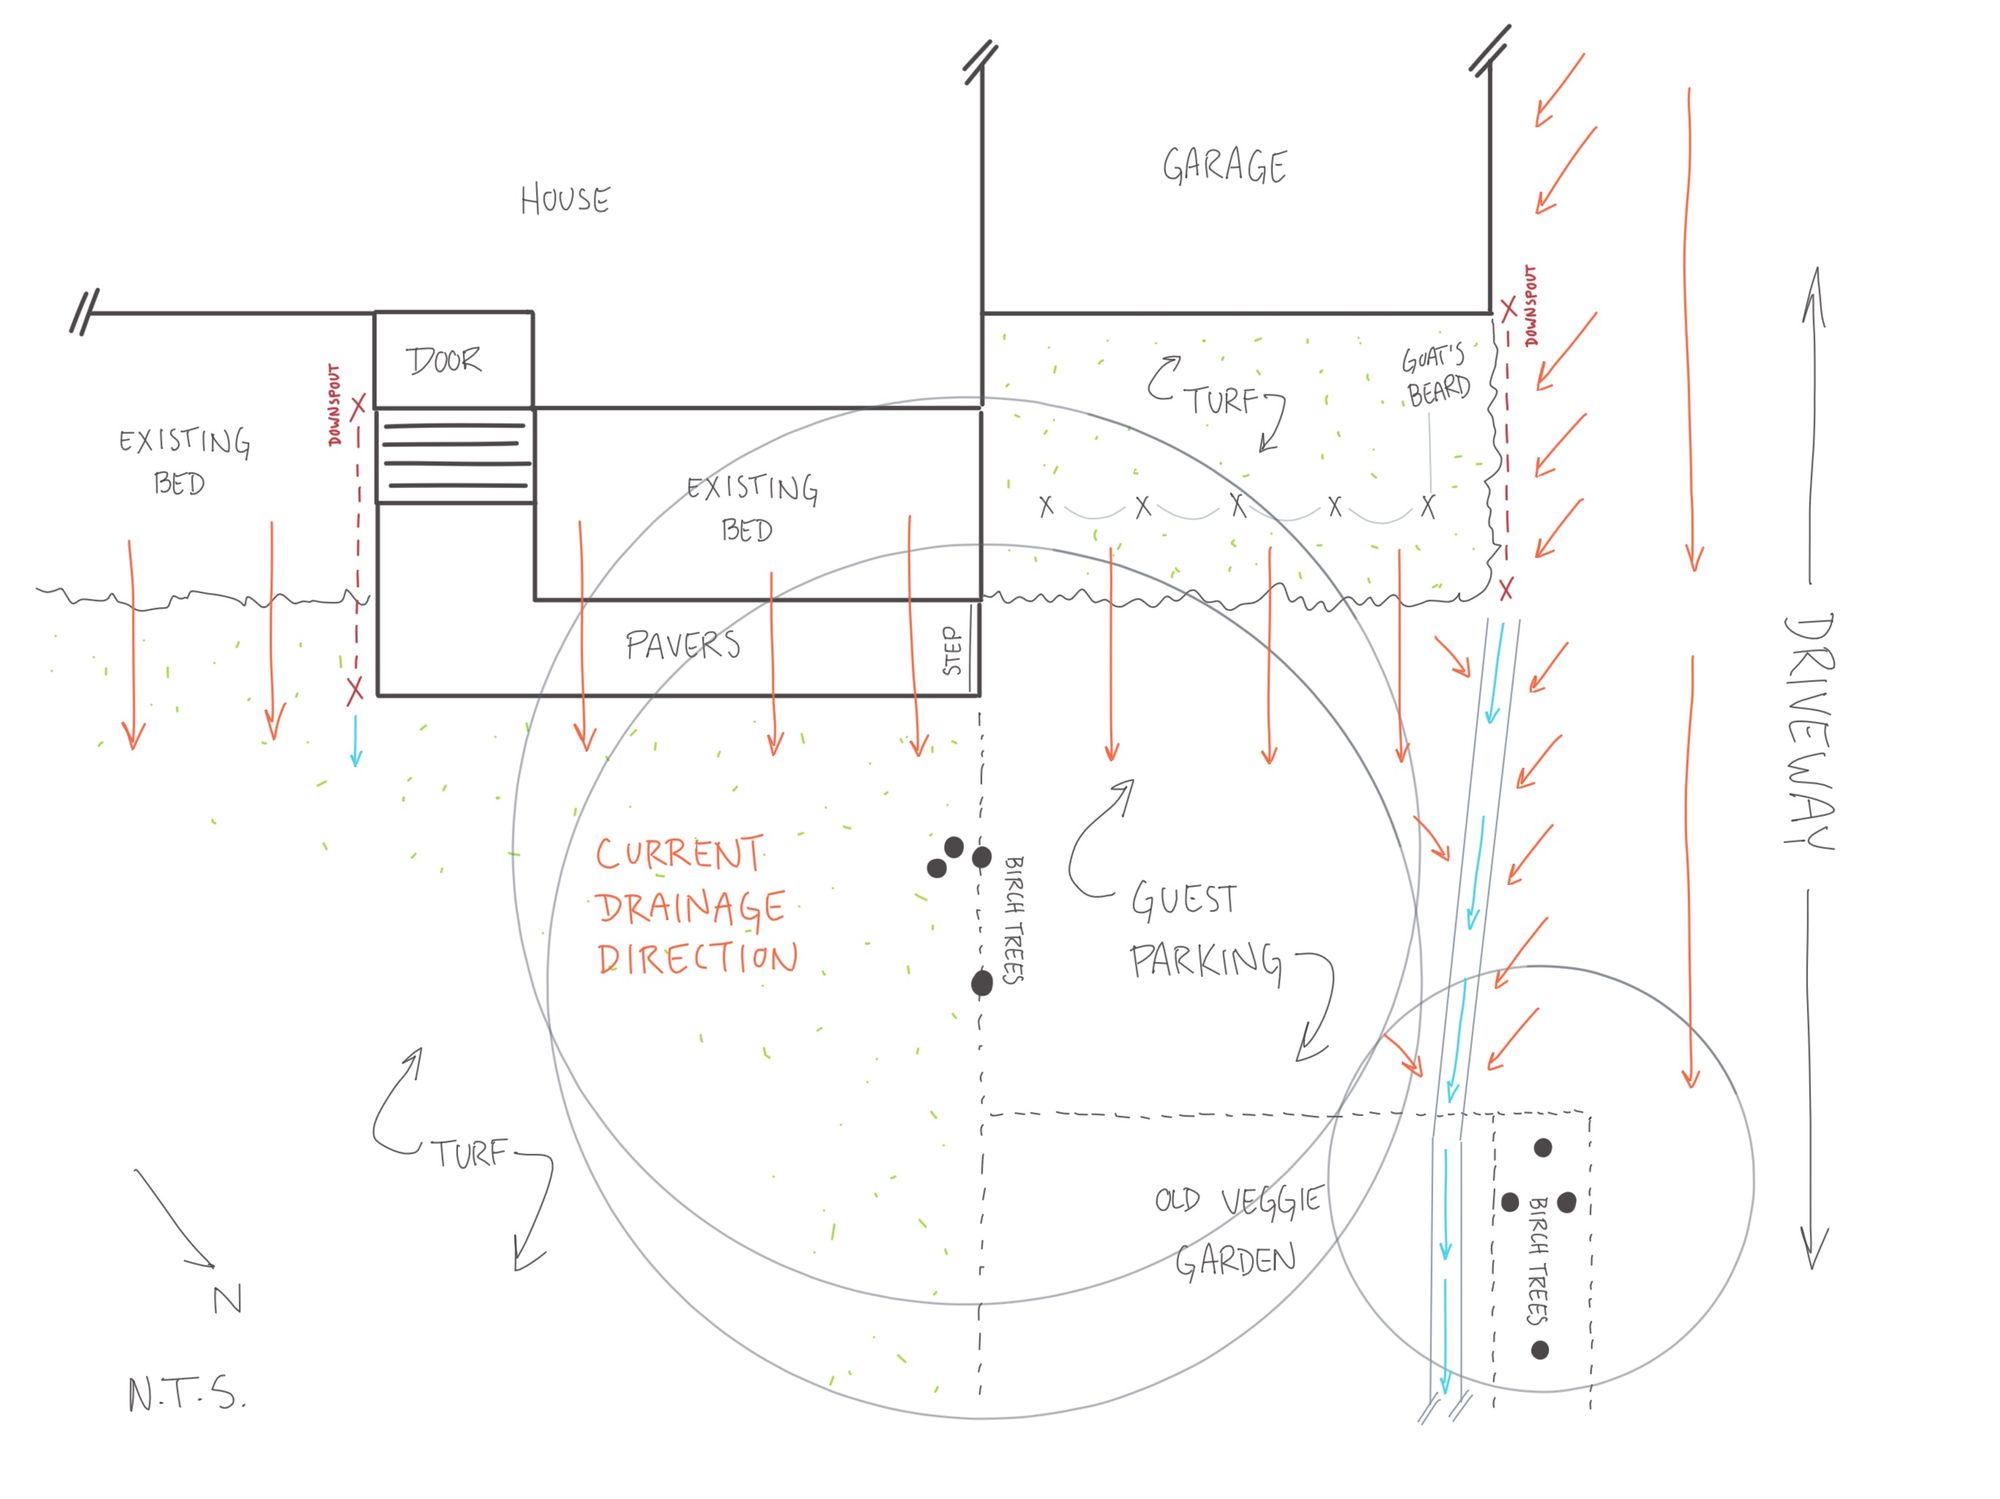
Otherwise, as I made my way around the property, it became increasingly clear where I need to start this spring: pathways (more specifically, drainage pathways). I’m not certain why the yard was graded the way it was, but in the backyard everything drains into the house, while in the front yard, the garden beds drain across the main pathway to the front door. My little drainage swale on the corner of the garage doesn’t help either, as now there is the added issue of uneven ground that gets very soft when it rains.
Either way, the poor direction of water flow impacts movement throughout the yard. The question is: how to address this issue in the short term knowing that the area will likely be completely dug up to repair the garage foundation?
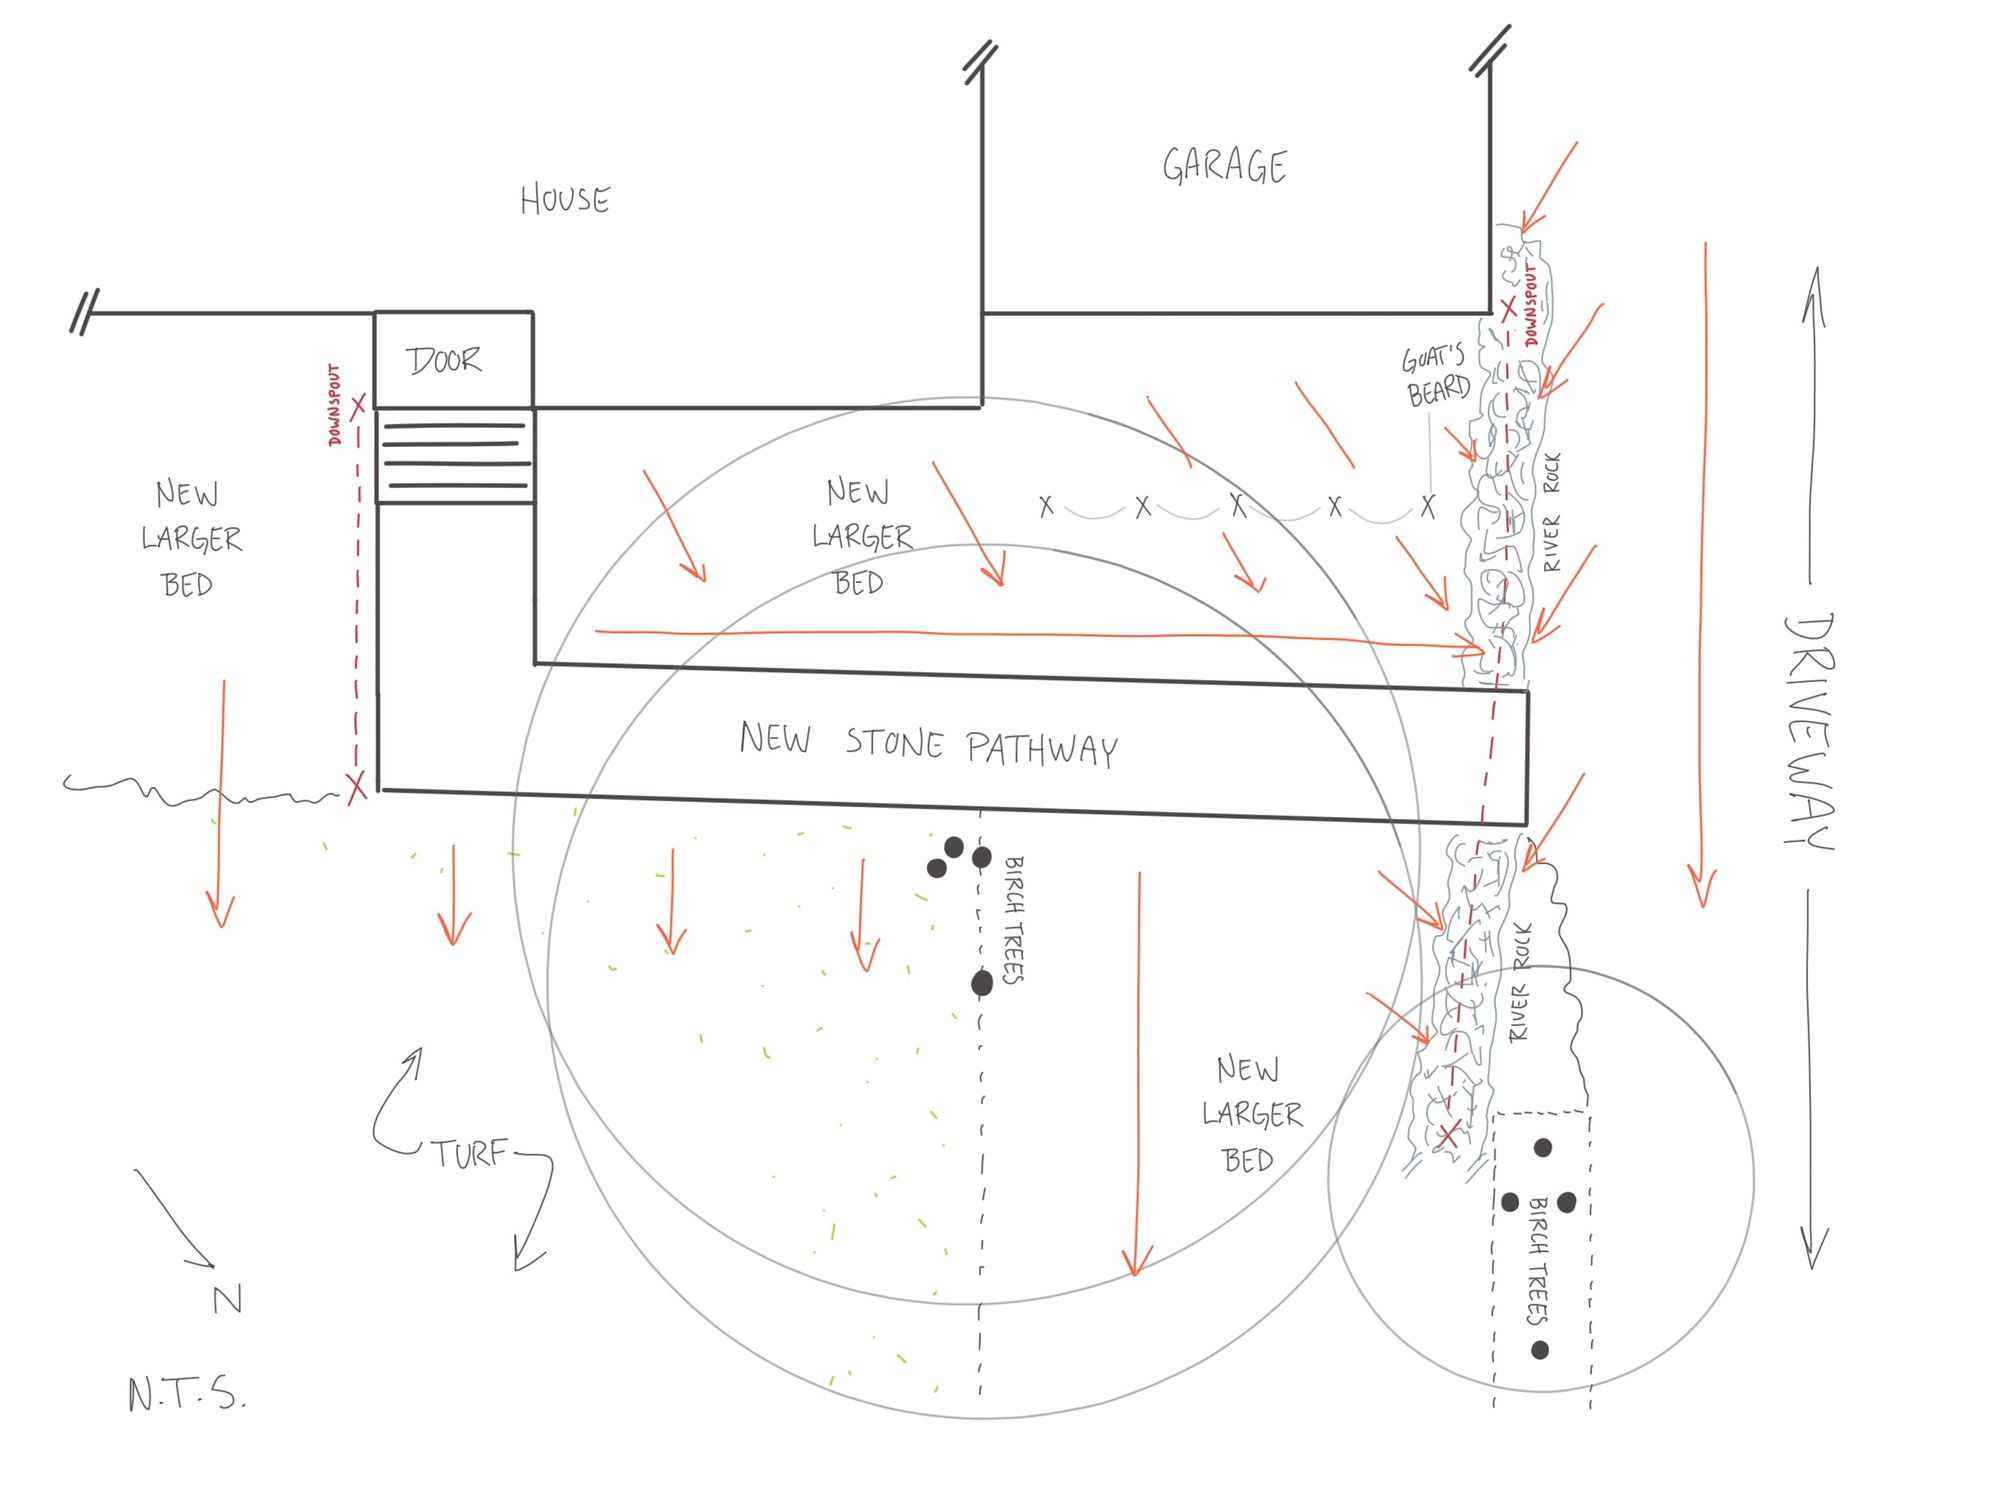
Let’s start with my little drainage swale. I would like to carry the plastic drain pipe I added to the end of the downspout across the guest parking area, all the way to the old veggie garden bed. There is just too much water coming off the roof to daylight right next to the primary pathway to the front door. There was a lot of ice building up on the ground throughout winter too — I would like to avoid that as much as I can.

However, I still need a swale to catch the water coming across the guest parking area, as well as anything coming across the front of the garage. And since I want to have a level pathway coming from the front door to the driveway, I will also need a secondary swale parallel to the pathway on the high side that connects to the first swale.

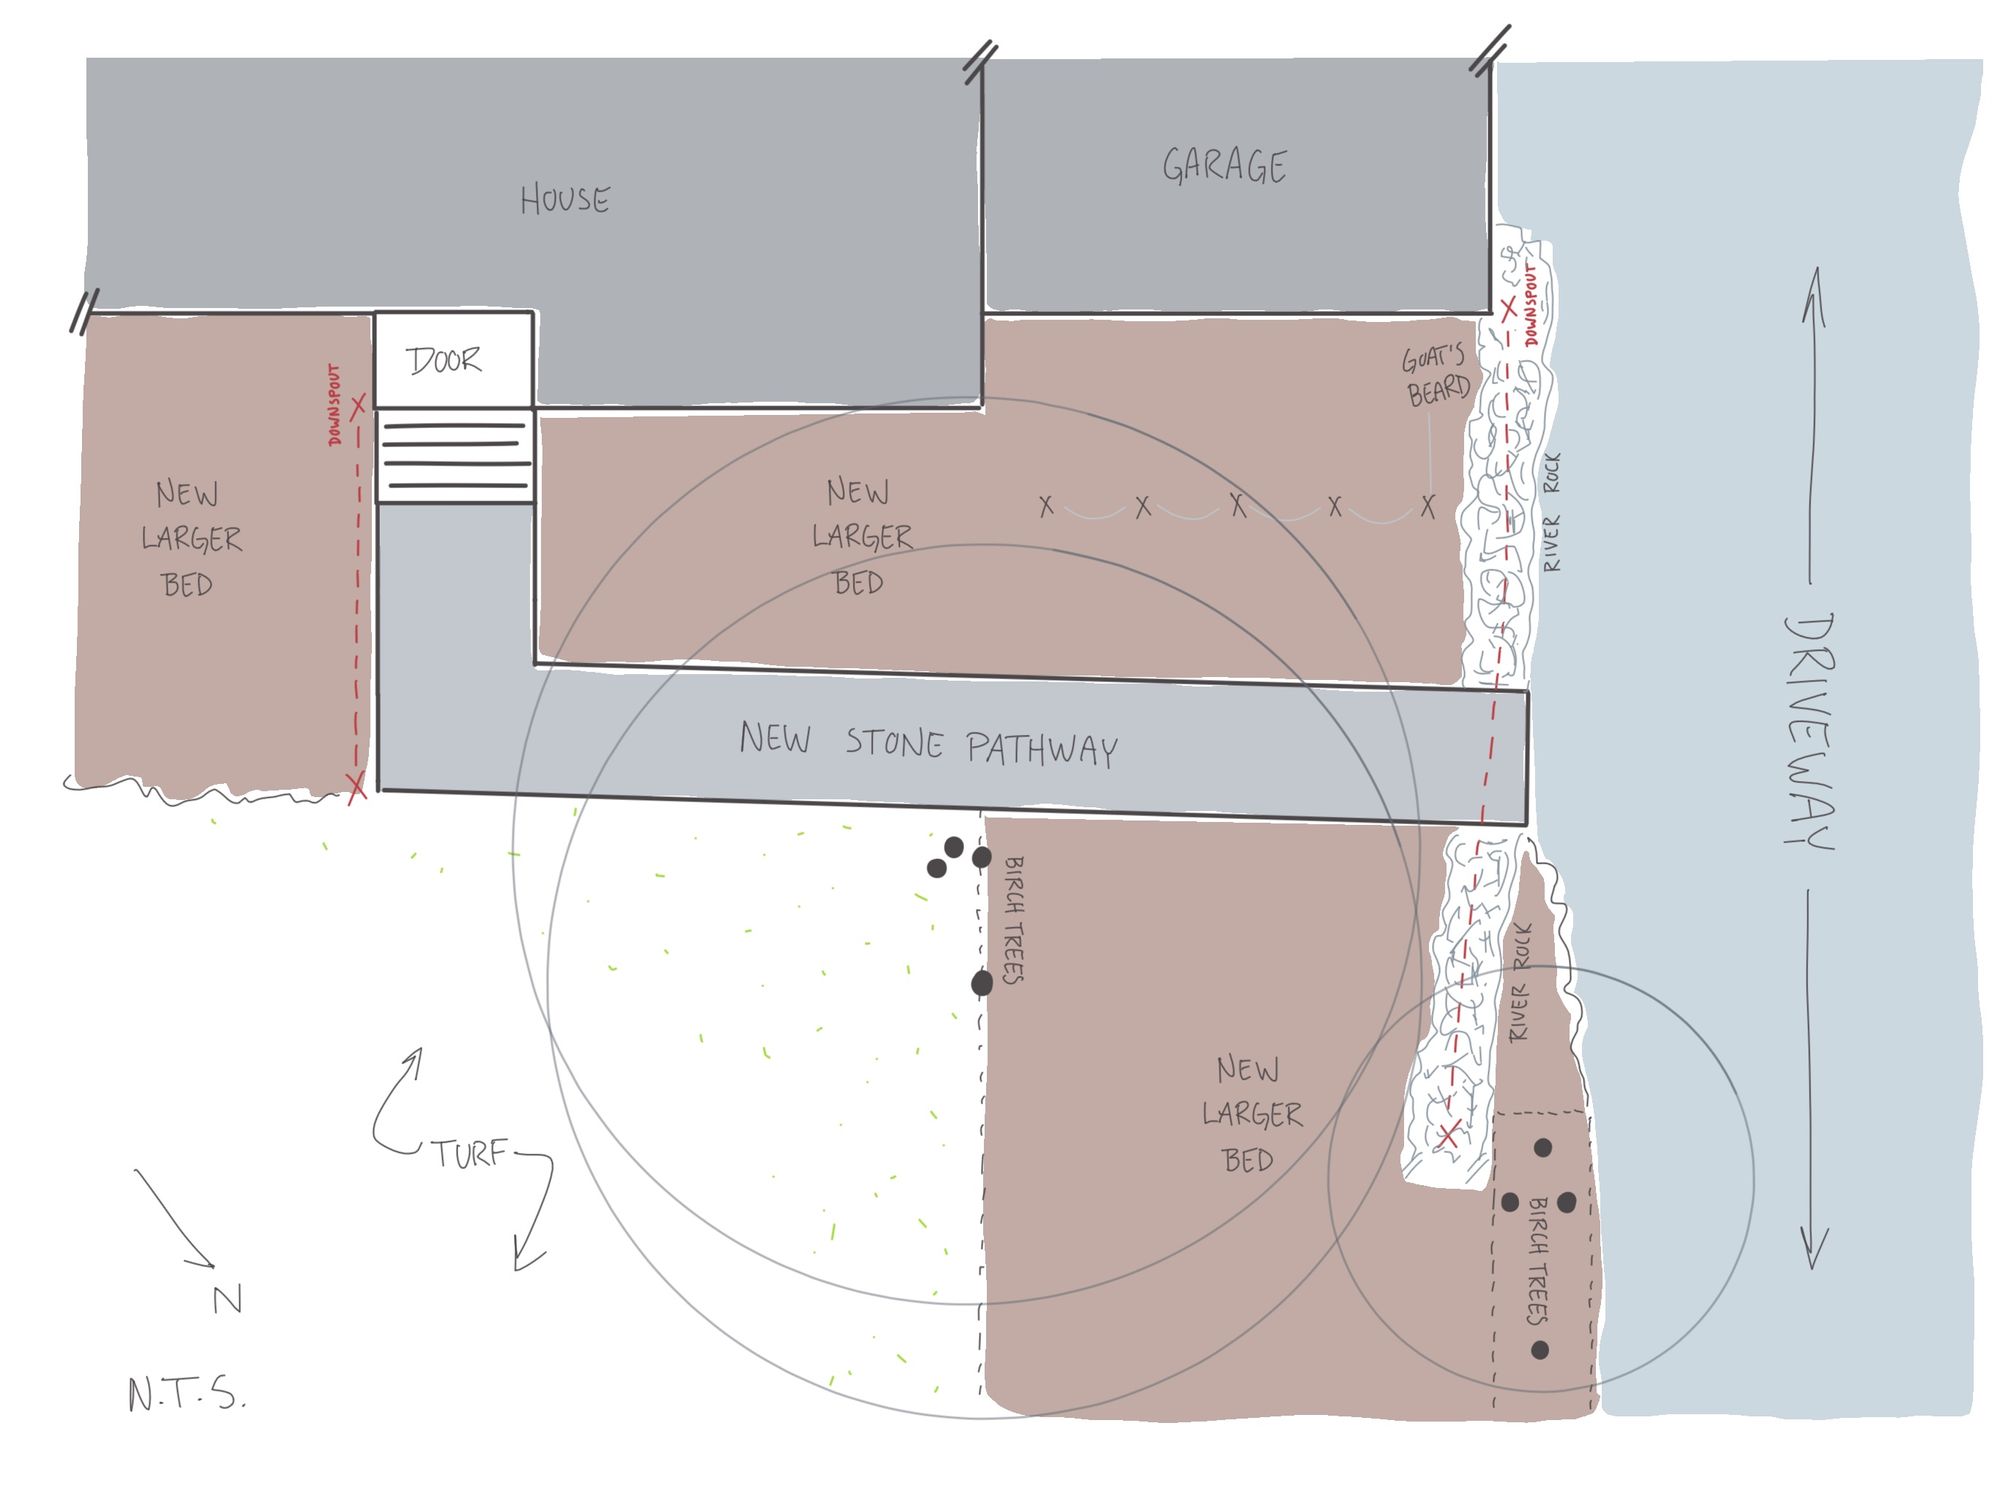
To keep things functional while looking as seamless as possible, I am thinking I will need to redo my little drainage swale and break it into two parts: a lower french drain wrapped in filter cloth, and an upper crushed stone pathway (or pea gravel pathway?) surrounded by river rock. Ideally, I would like to have a wooden boardwalk, but I am not convinced it will work in such a wet and shady location.
I know I am going to get rid of the guest parking area (parking under old birch trees — yikes!), so I have lots of room to play with plantings and perspectives as you approach the front door. I would also like to move the pathway further away from the house. First, it will give me a little more sun to work with in the garden bed areas, and second, I can increase the width of the pathway to make it feel less claustrophobic. One row of pavers just isn’t enough space!
In the backyard I have more pavers (two across this time!). But they don’t connect to the driveway (they dead end into turf immediately adjacent to the driveway). The highest point is on the driveway corner, and the low point is at the opposite end under the deck where the concrete footings are getting heaved up in the winter (not great).
Ideally, I would build a higher pathway than the surrounding areas, but I need to control the water and direct it away from the house. That means I need to dig down and regrade so that the water collects and moves away from the house / deck towards the driveway. To make things slightly more challenging, I also have to figure out what to do with the ice buildup underneath the new heat pump that was installed in November. The amount of ice was substantial, and it wasn’t that cold of a winter.
This is where my mind keeps returning to the idea of using pea gravel. I could regrade the base of the pathway so that the water collects and moves in the direction I want it to, and then top off the regraded pathway with an inch of pea gravel.
This could be beneficial in a few ways beyond drainage. First, I have always loved the look and feel of Japanese garden pathways. Second, using loose pea gravel will discourage the growth of weedy volunteers from establishing (an issue that I have been struggling with in the rarely used guest parking area). Third, because it is somewhat loose, it could also help with traction issues in icy conditions during the swing seasons. I think, anyway (it’s a perfect excuse to try it out and see!)…
I know pea gravel can be somewhat messy, but that’s an issue I already have to deal with. The entire driveway is gravel, which gets thrown around by the snow blower at the beginning and end of winter. There is a lot of raking to be done in spring at my house!
I also have some preliminary ideas for a new garden bed covering the guest parking area, but nothing concrete enough to share yet. My tentative plan is to focus on regrading the pathways and new garden bed areas in May and then plant in mid-June. I’ll have more to show you next month.
Enjoy all the spring ephemerals!
n
Updates:
I have been working (in my spare time) on a design guide. I haven’t completed it yet, and it is somewhat bare bones at this point, but I am making steady progress. So far, it includes:
My plan is to include eventually:
- Design: Plans
- Implementation: Site Preparation
- Implementation: Planting
- Implementation: Finishing Details
I’m sure there will be more sections as I make my way through, too (microclimates are an obvious one). Regardless, the design guide can be found here. Please let me know what you think!
design prompt: document
Another thing that has become obvious to me so far this spring is how important and useful taking a few random pictures or videos of my property can be. Things, obviously, change from season to season and year to year. But having an easily accessible record of issues or views from frequently visited spots is fantastic! Anything to reduce relying on my brain to remember something when I need it (which, in my experience, rarely works).
For me, I am continuing to build a record of my main viewpoints from the house, what is in flower, when they stop, and what issues crop up. I don’t think I’ll look at the images again until winter when I have time to sit down and work through them, but I know they will be there when I am finally ready.
Your design prompt for the month:
Take pictures or videos of your space this year as plants begin to wake up. Follow this through to fall when things go dormant. Nothing fancy — no pressure. And when you get that gardening itch in March during the first false spring of the year, return to the pictures/videos and see what pops into your head.