Planting Plans
When you have worked through your concept plan and have a solution to your particular problem that you are happy with, it is time to move on to the nitty-gritty: showing where each plant goes.
This is where working with an iPad and an app like Concepts will pay off, particularly if you are working on a more complicated design. Concepts gives you a circle tool to use where you can adjust the radius of the circle to anything you want. You don’t have to mess around with circle tracing tools that might be slightly off from what you want. You can also create a small legend of circles and then copy / paste as you go. It is a huge time saver.
You can still do this stage on grid paper and then estimate plant numbers based off their sizes in your plant list, but I don’t like leaving things to chance. I often find that working through a planting plan acts as a final check on the overall design, as you will inevitably shift things around slightly from your concept plan. But again, your milage may vary depending on the complexity of your project.
Sizing
The first trick to working on a planting plan is to make your circles slightly smaller than the sizes you identified for each plant in your plant list. For trees, I adjust the widths to 65% of their maximum; for shrubs and perennials, I adjust the widths to 85% of their maximum. The main reason I do this is that plants are complex. Your site will be different from the ideal growing conditions the plants were measured in originally (never mind hardiness zone differences). I work in a zone 3 / 4 where good soil is limited or non-existent. Winters can be harsh, and predation is common. This means that trees don’t often grow to their maximum potential. Shrubs typically get close; perennials get even closer, provided they have enough soil to grow in.
Layers
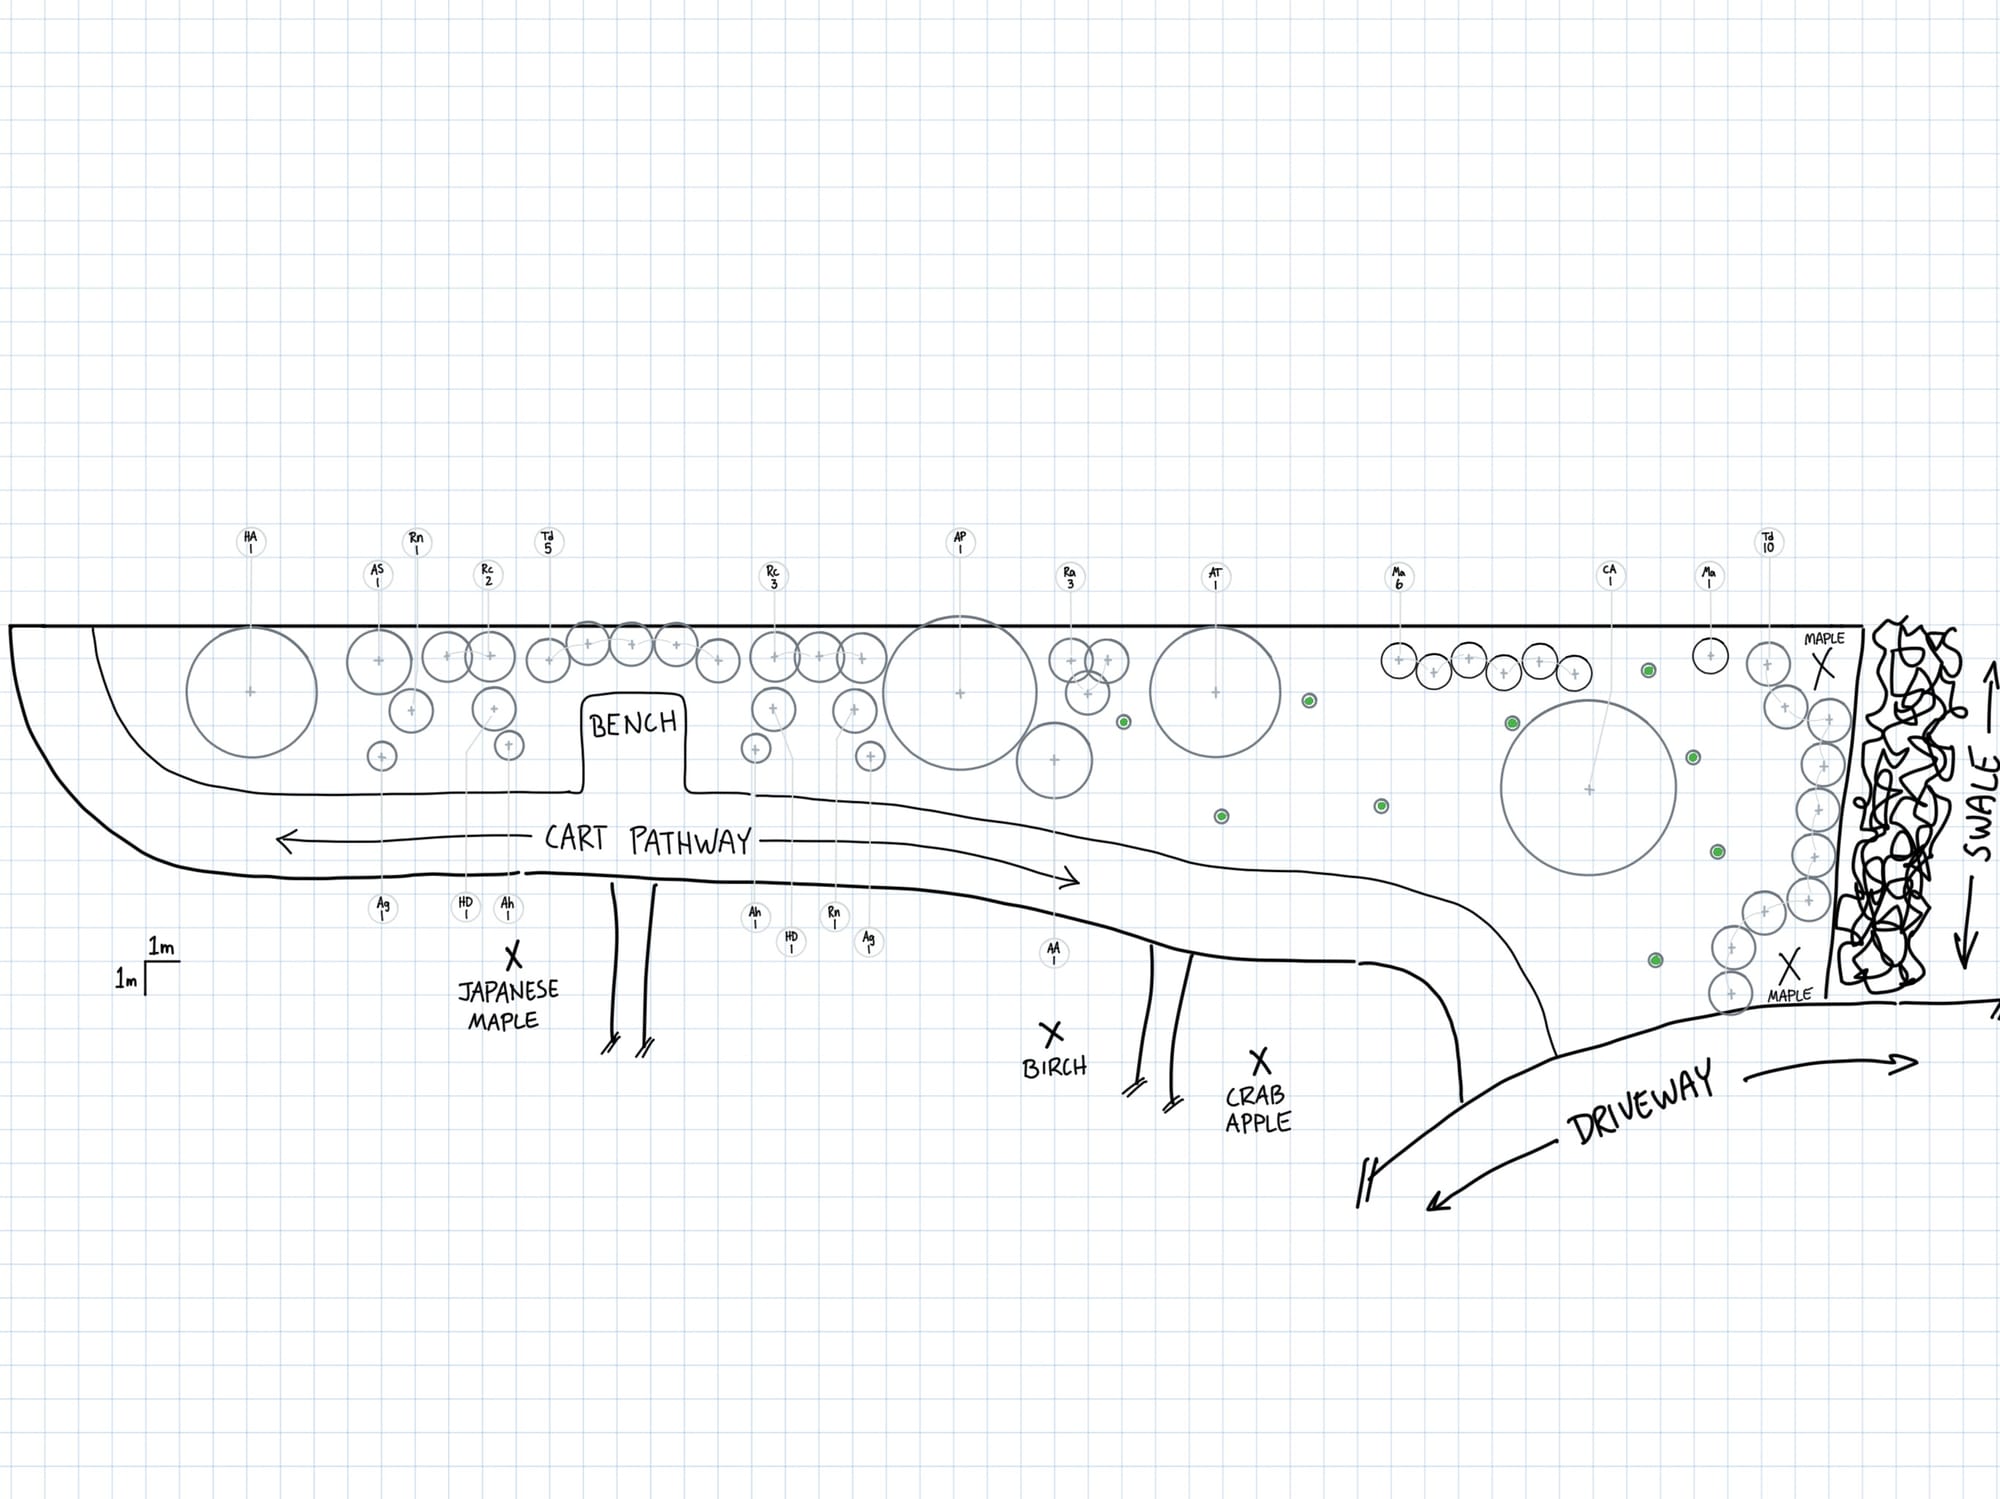
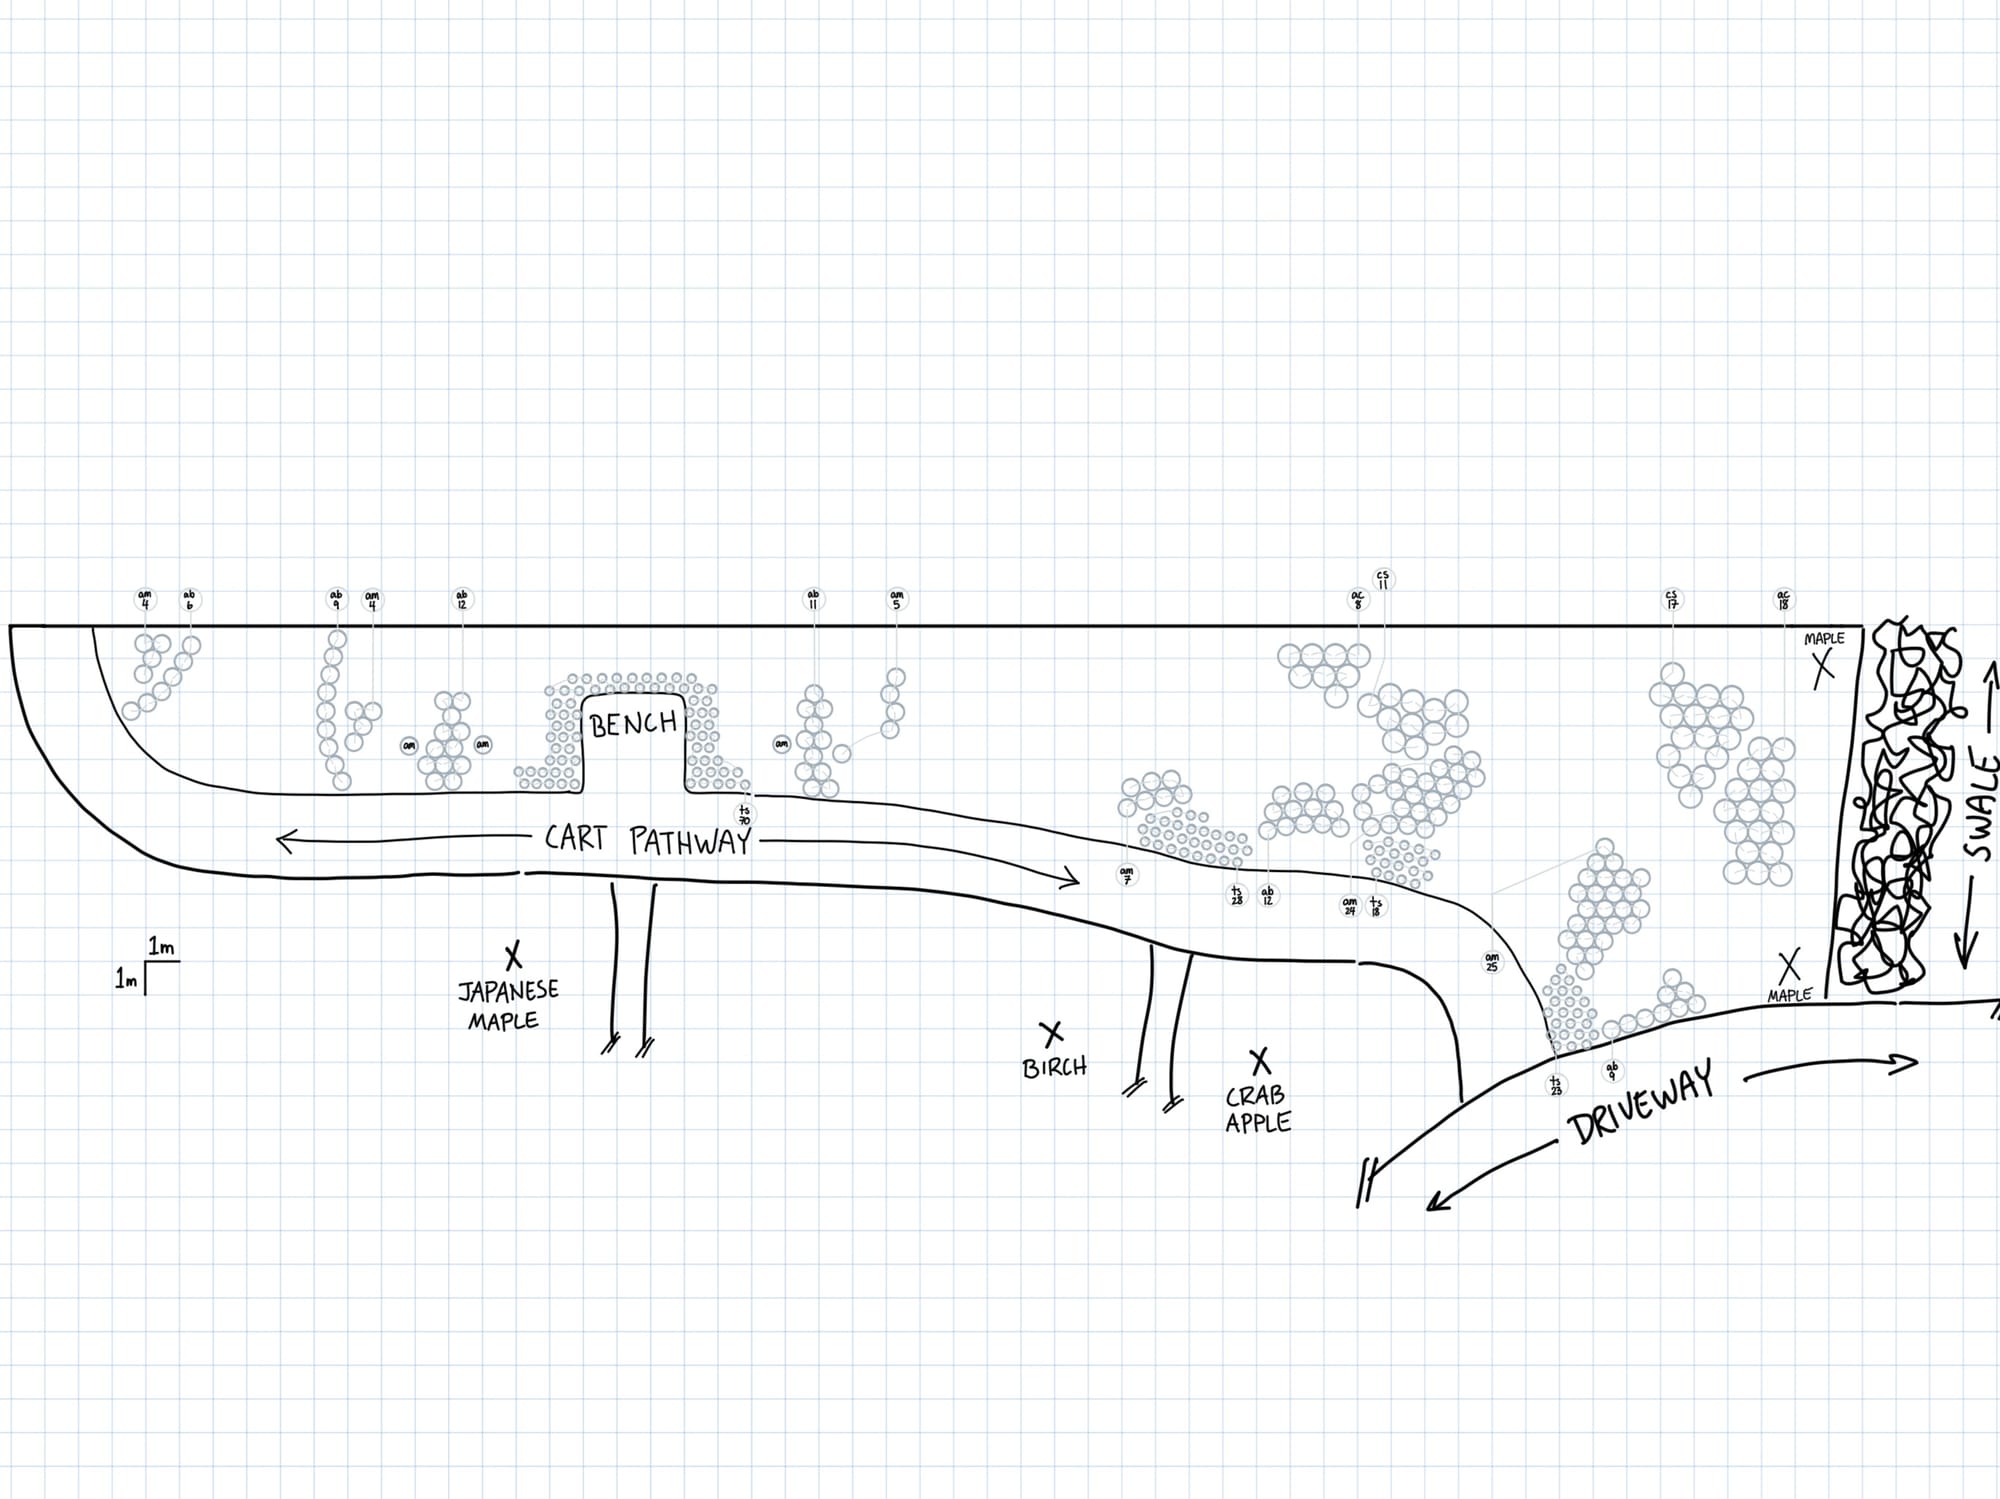
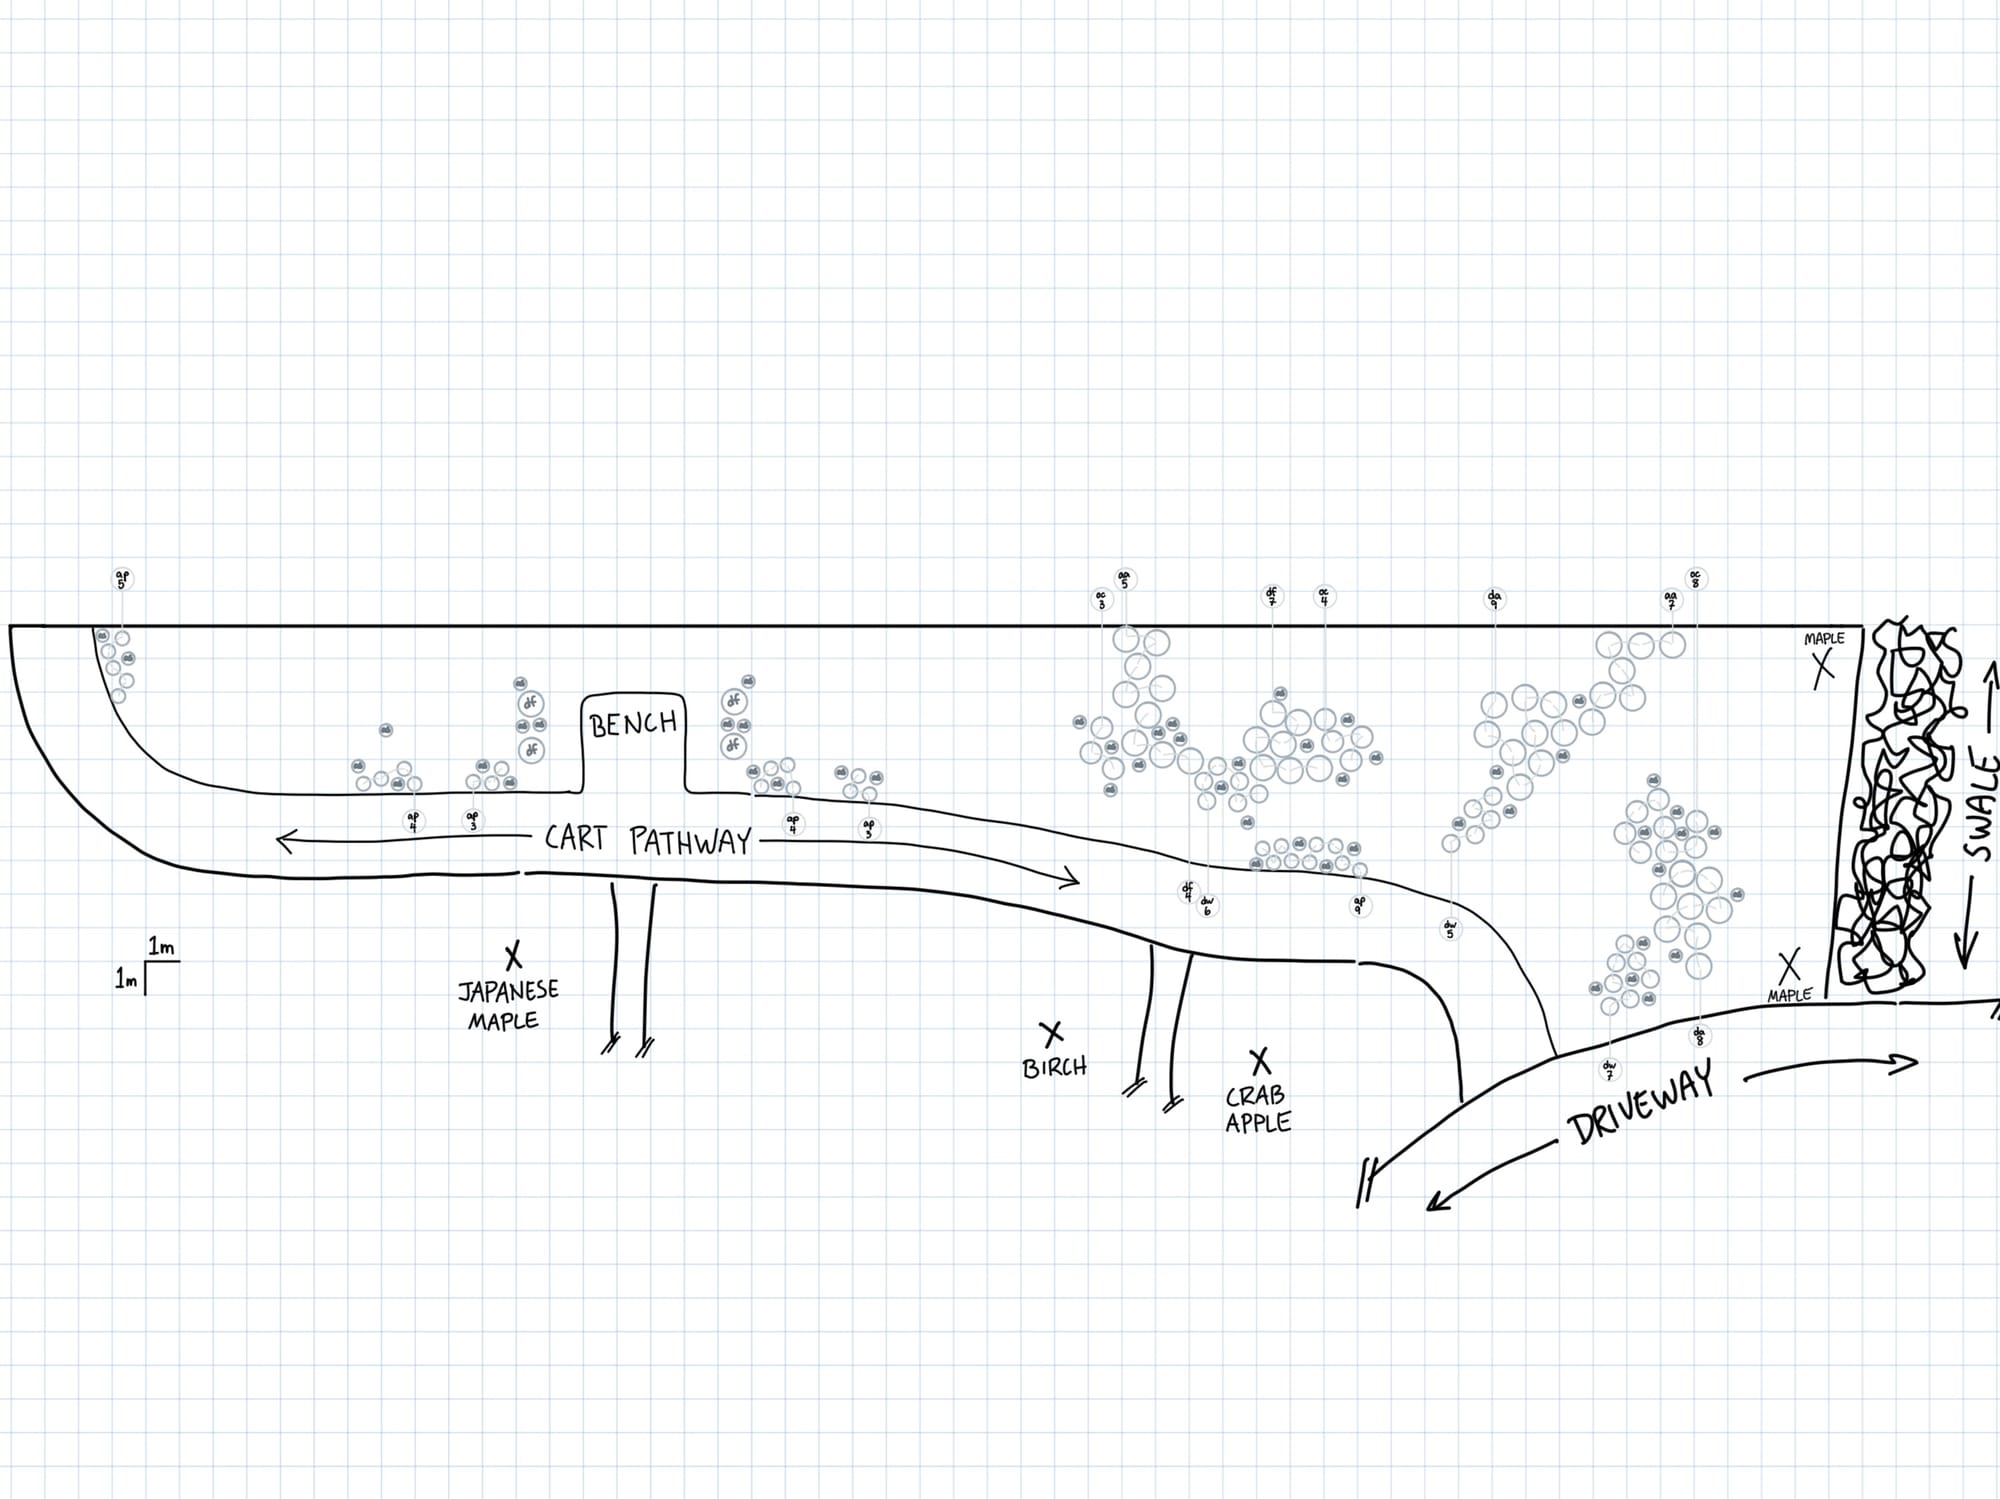
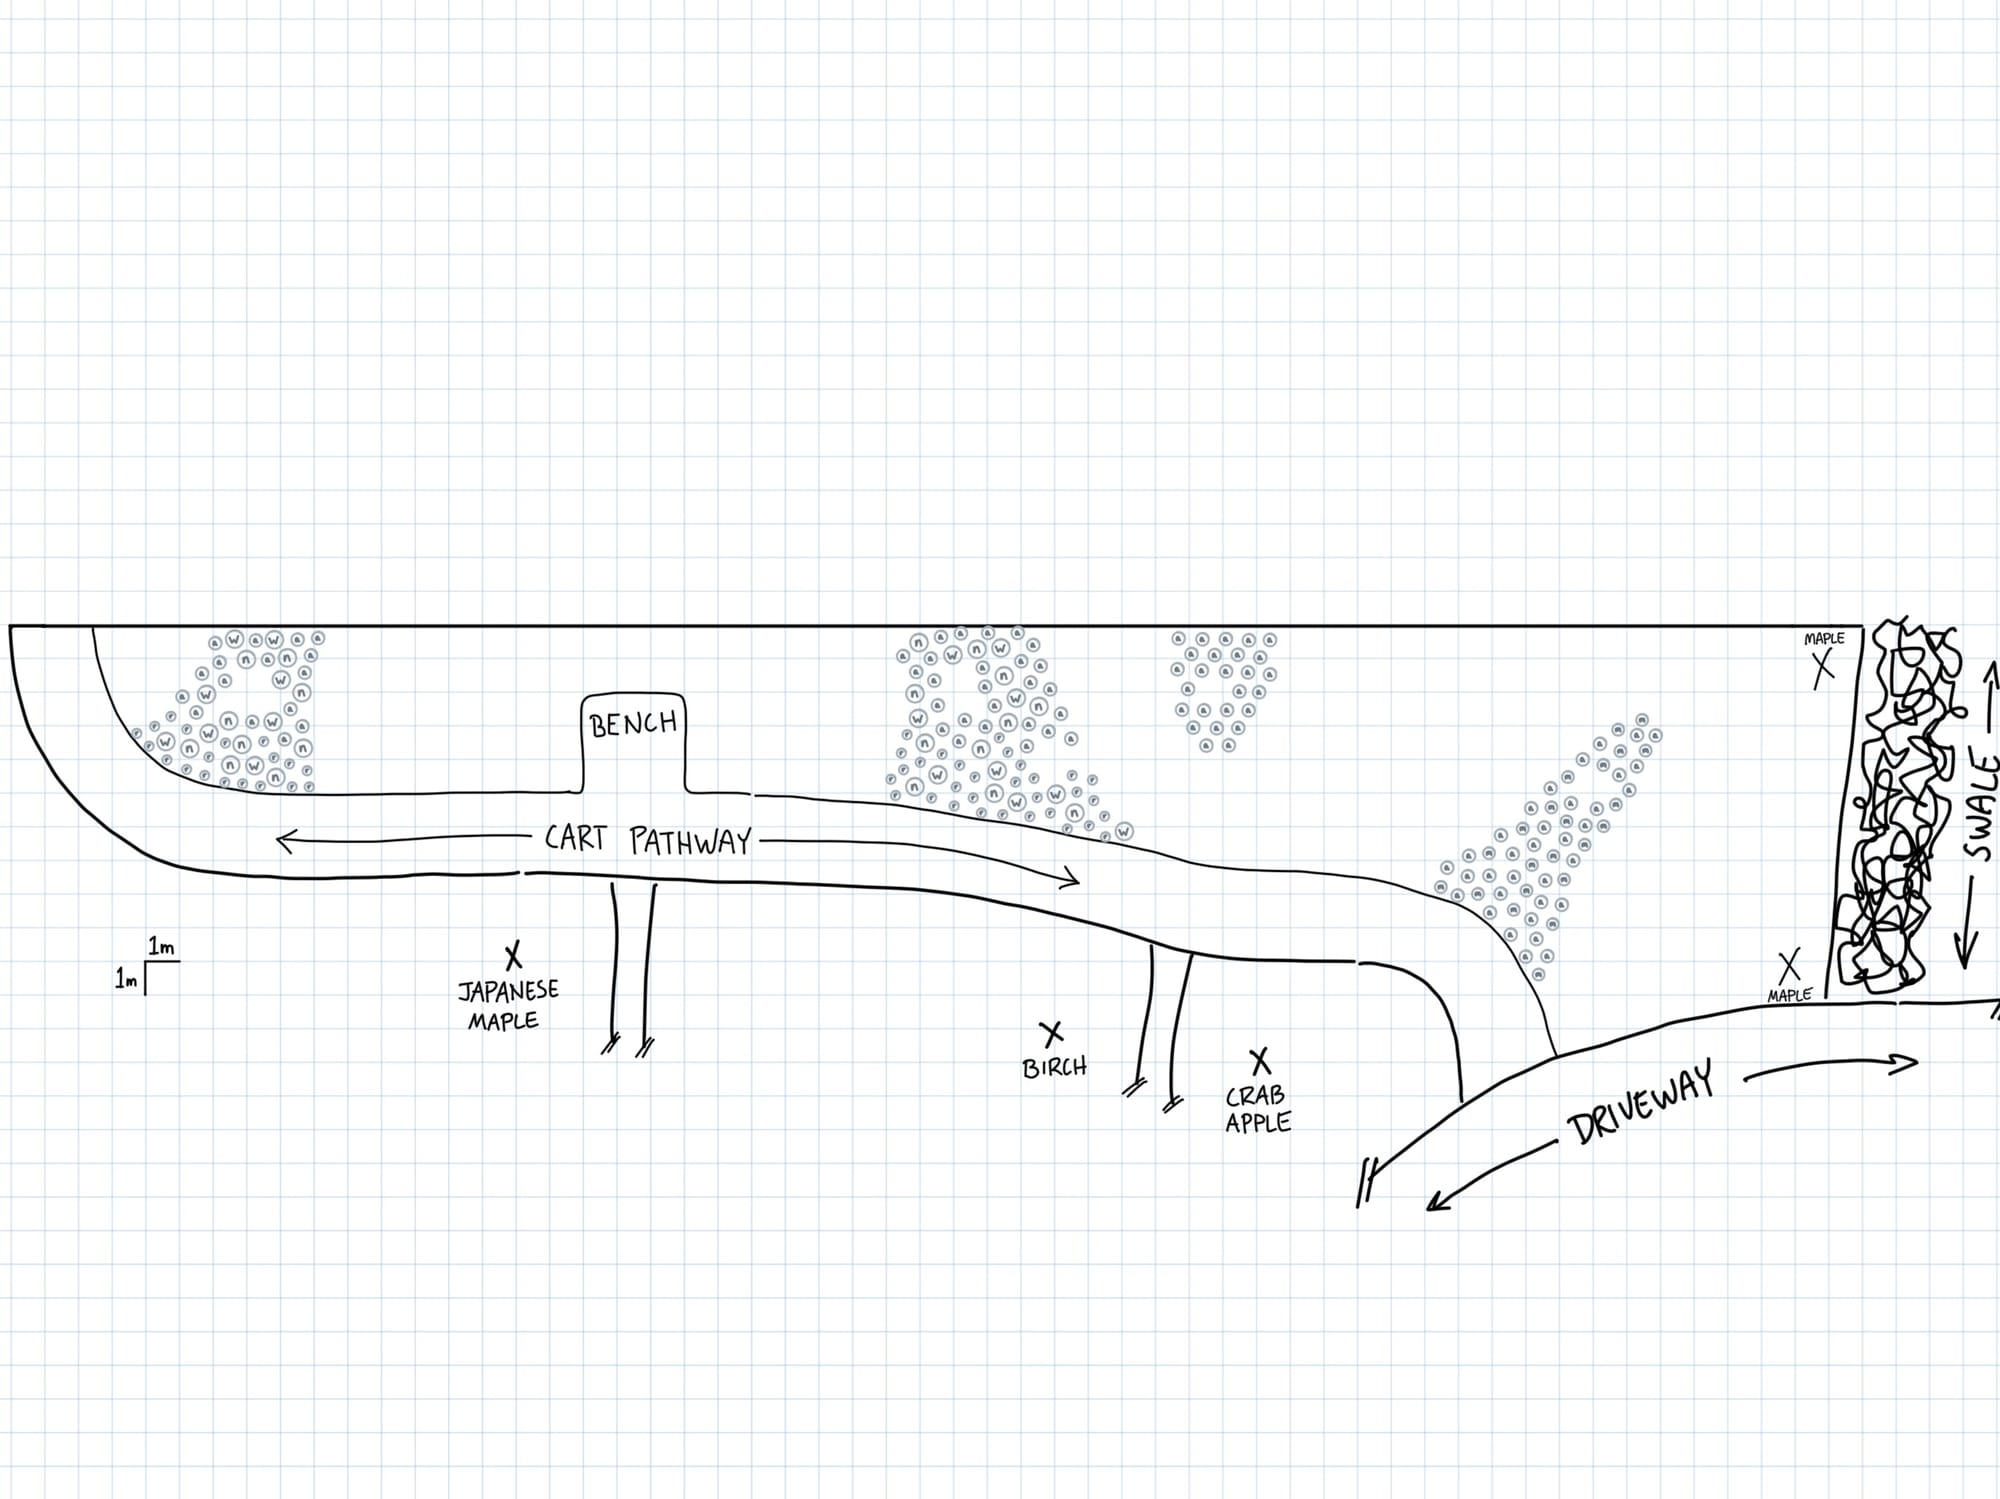
The next trick is to create your planting plan in layers — one on top of another. Essentially, you want to start with the largest plants and work your way down. Similar to when you took your initial measurements to create a base plan, here you are creating a series of construction drawings that will guide you when you go build your garden. The order is important.
Here is the order I work in:
- layer one
- trees & shrubs
(NB: this layer can be split up for ease of reading, depending on the number of trees and shrubs used) - layer two
- primary perennials (large perennials or discrete perennial blocks)– scatter perennials (perennials that are used sparingly and often randomly) - layer three
- matrix perennials (perennials that are used on mass throughout the design) - layer four
- bulbs


Example of planting plan layers
Keys
While you are creating your different layers and plant circles, you should also take the time to identify what those circles mean. To accomplish this, I use small curved lines to connect the same plants together using a light grey line weight.
These curved lines then terminate on one side with a longer straight line and a key code at the end. This code contains an abbreviation for the plant that corresponds with the plant list and a number which indicates how many of that particular plant are within the grouping.
I tend to use five types of key codes for plants that tie back to the different drawing layers:
- AA: two capital letters for trees
- Aa: one capital and one lower case letter for shrubs
- aa: two lower case letters for perennials
- a: one lower case letter for matrix plants
- colourful symbols: one distinct symbol for each type of bulb used
Quality Control
Checking Numbers
The last thing I do before moving to the implementation stage is to double-check the quantities listed in each key code and within the plant list. To do so, I simply create another layer and colour in the circles and key codes with a grey colour as I go along. I also write down the key code numbers in my plant list and do a final tally once I have gone through the planting plan thoroughly.
It isn’t pretty when done, but you can rest knowing that there are no mistakes with the numbers when you go to purchase your plants.