Base Plan
The base plan is the foundation for your design. In short, you will be translating your rough measurement drawings into a scaled drawing (either on grid paper or on an iPad). If you are going the iPad route, I highly recommend the app Concepts. It is straightforward to use and can do everything you need to create different kinds of drawings. It is also a vector program, which means you can zoom in and out without losing any quality when exporting finished drawings.
I start my base plan by using a thin grey colour to create my primary and secondary measurement lines. I then use hash marks along each line to identify specific measurements that I made. Basically, you want to recreate the steps you took to make your rough measurement drawing. Start with your primary line at your chosen anchor, then recreate your secondary lines, using hash marks to identify anything important.
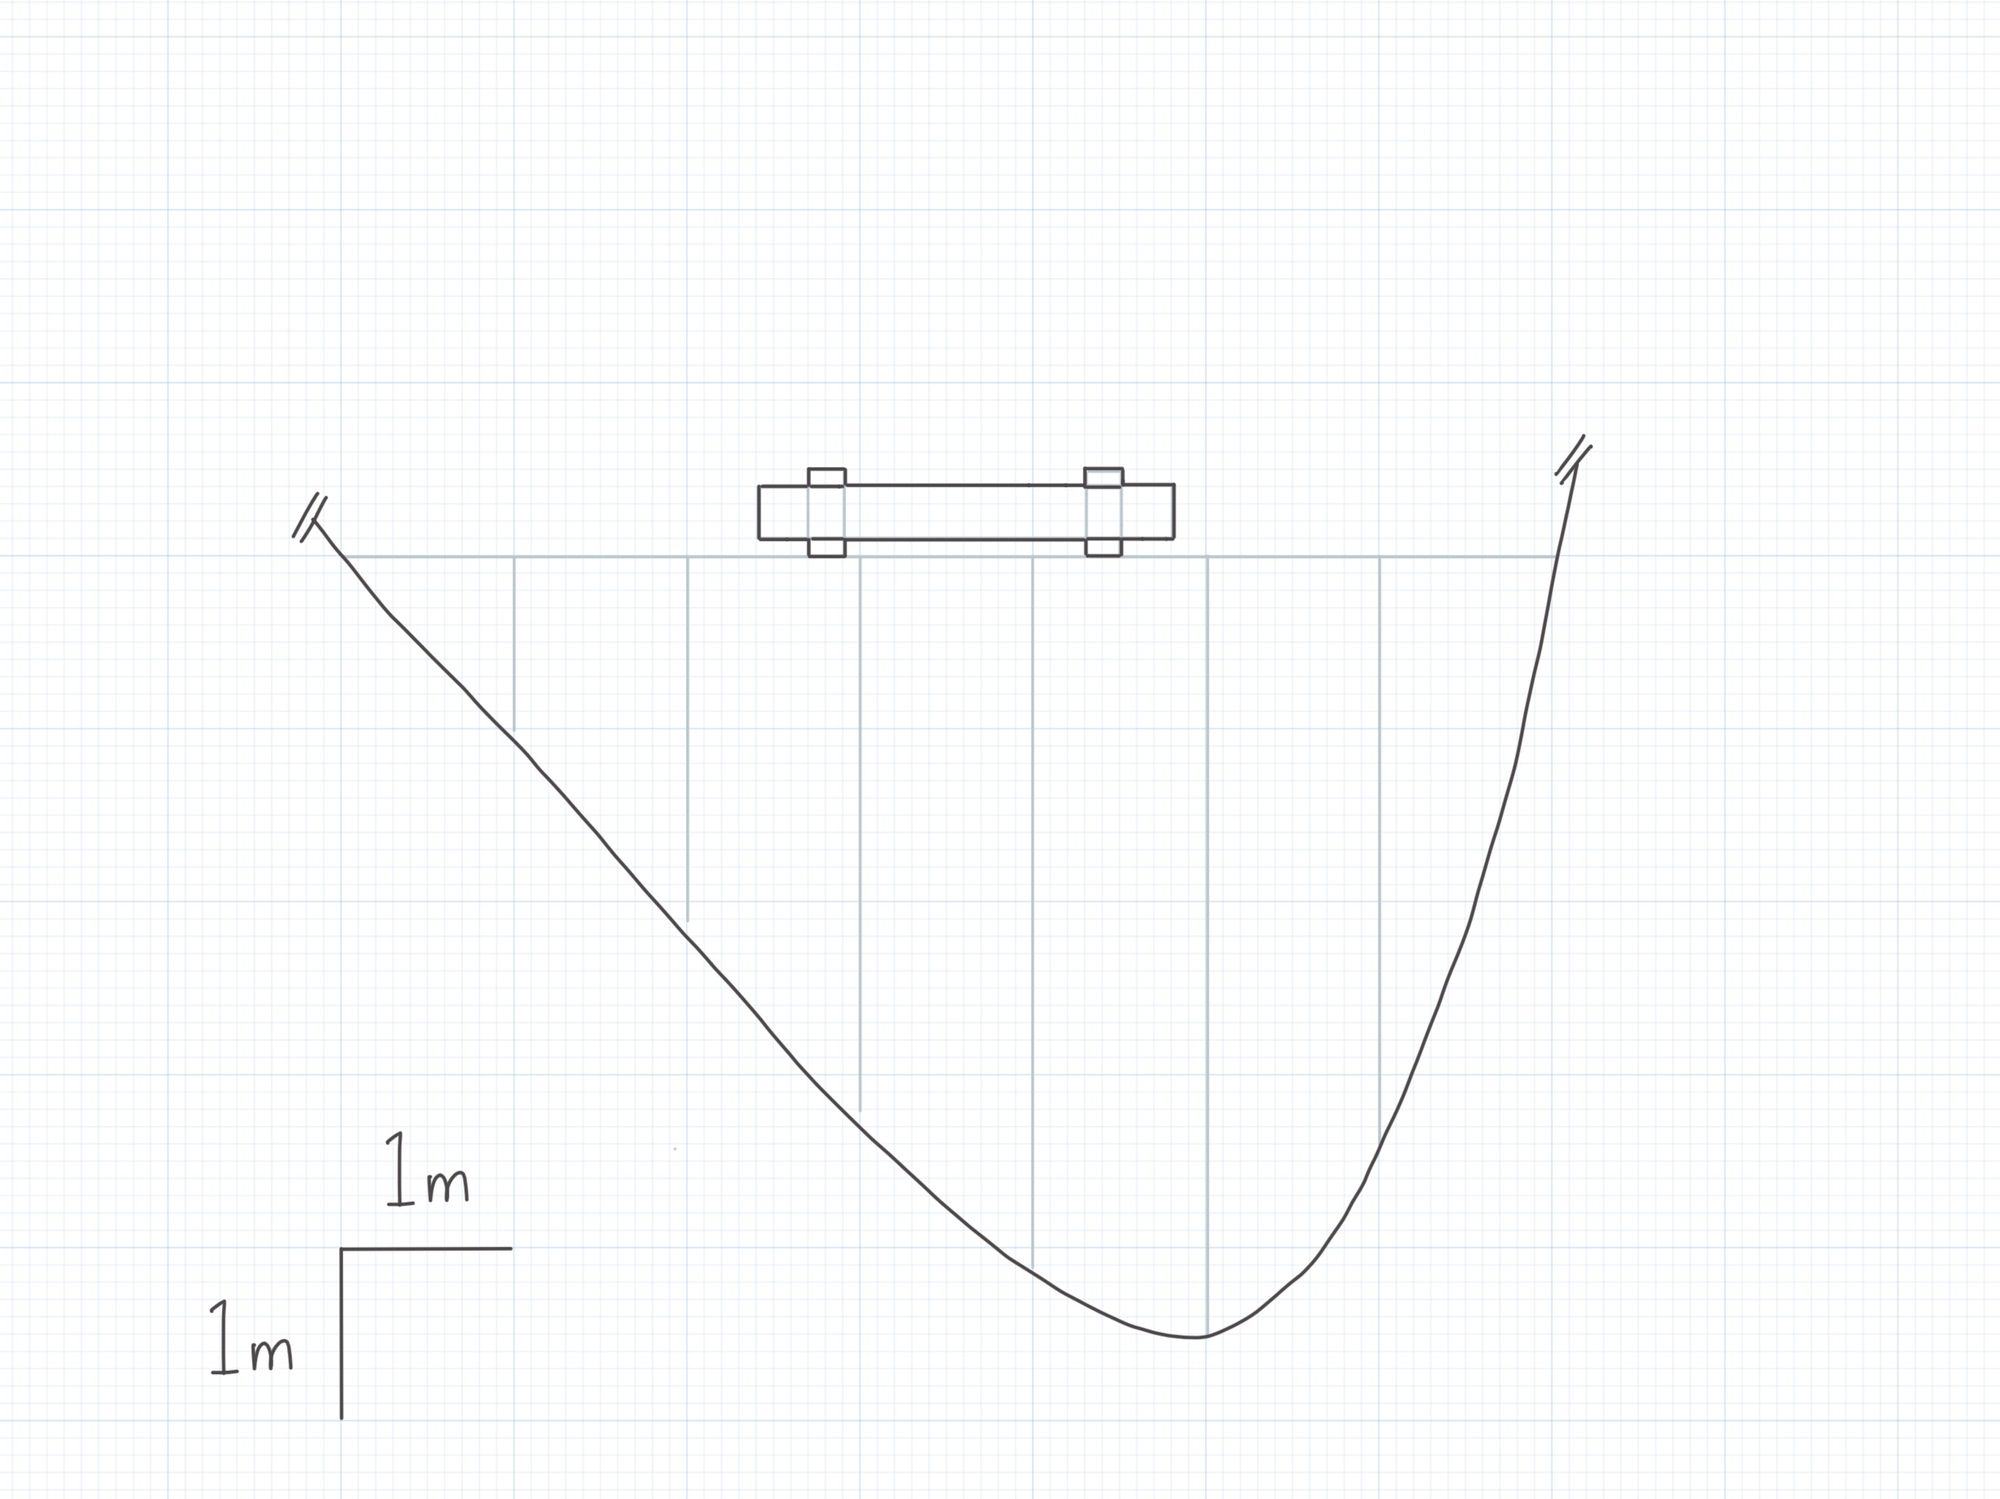
Once that is done, use a thicker dark grey colour to create a new, more visible layer. It’s like connecting the dots between hash marks. I use an almost black colour to draw buildings and hardscaping, and a medium grey colour to draw existing garden beds, trees, and shrubs. Colouring isn’t necessary at this stage, but can still be fun to do (who doesn’t like colouring!).
The last thing to identify on your base plan is a scale line or marker, and a north arrow. For small drawings, I usually outline two sides of a square on the grid paper and identify each side as 1m.
Concept Plan
The Open & Closed Modes
With the base plan completed, we can move on to the creative part!
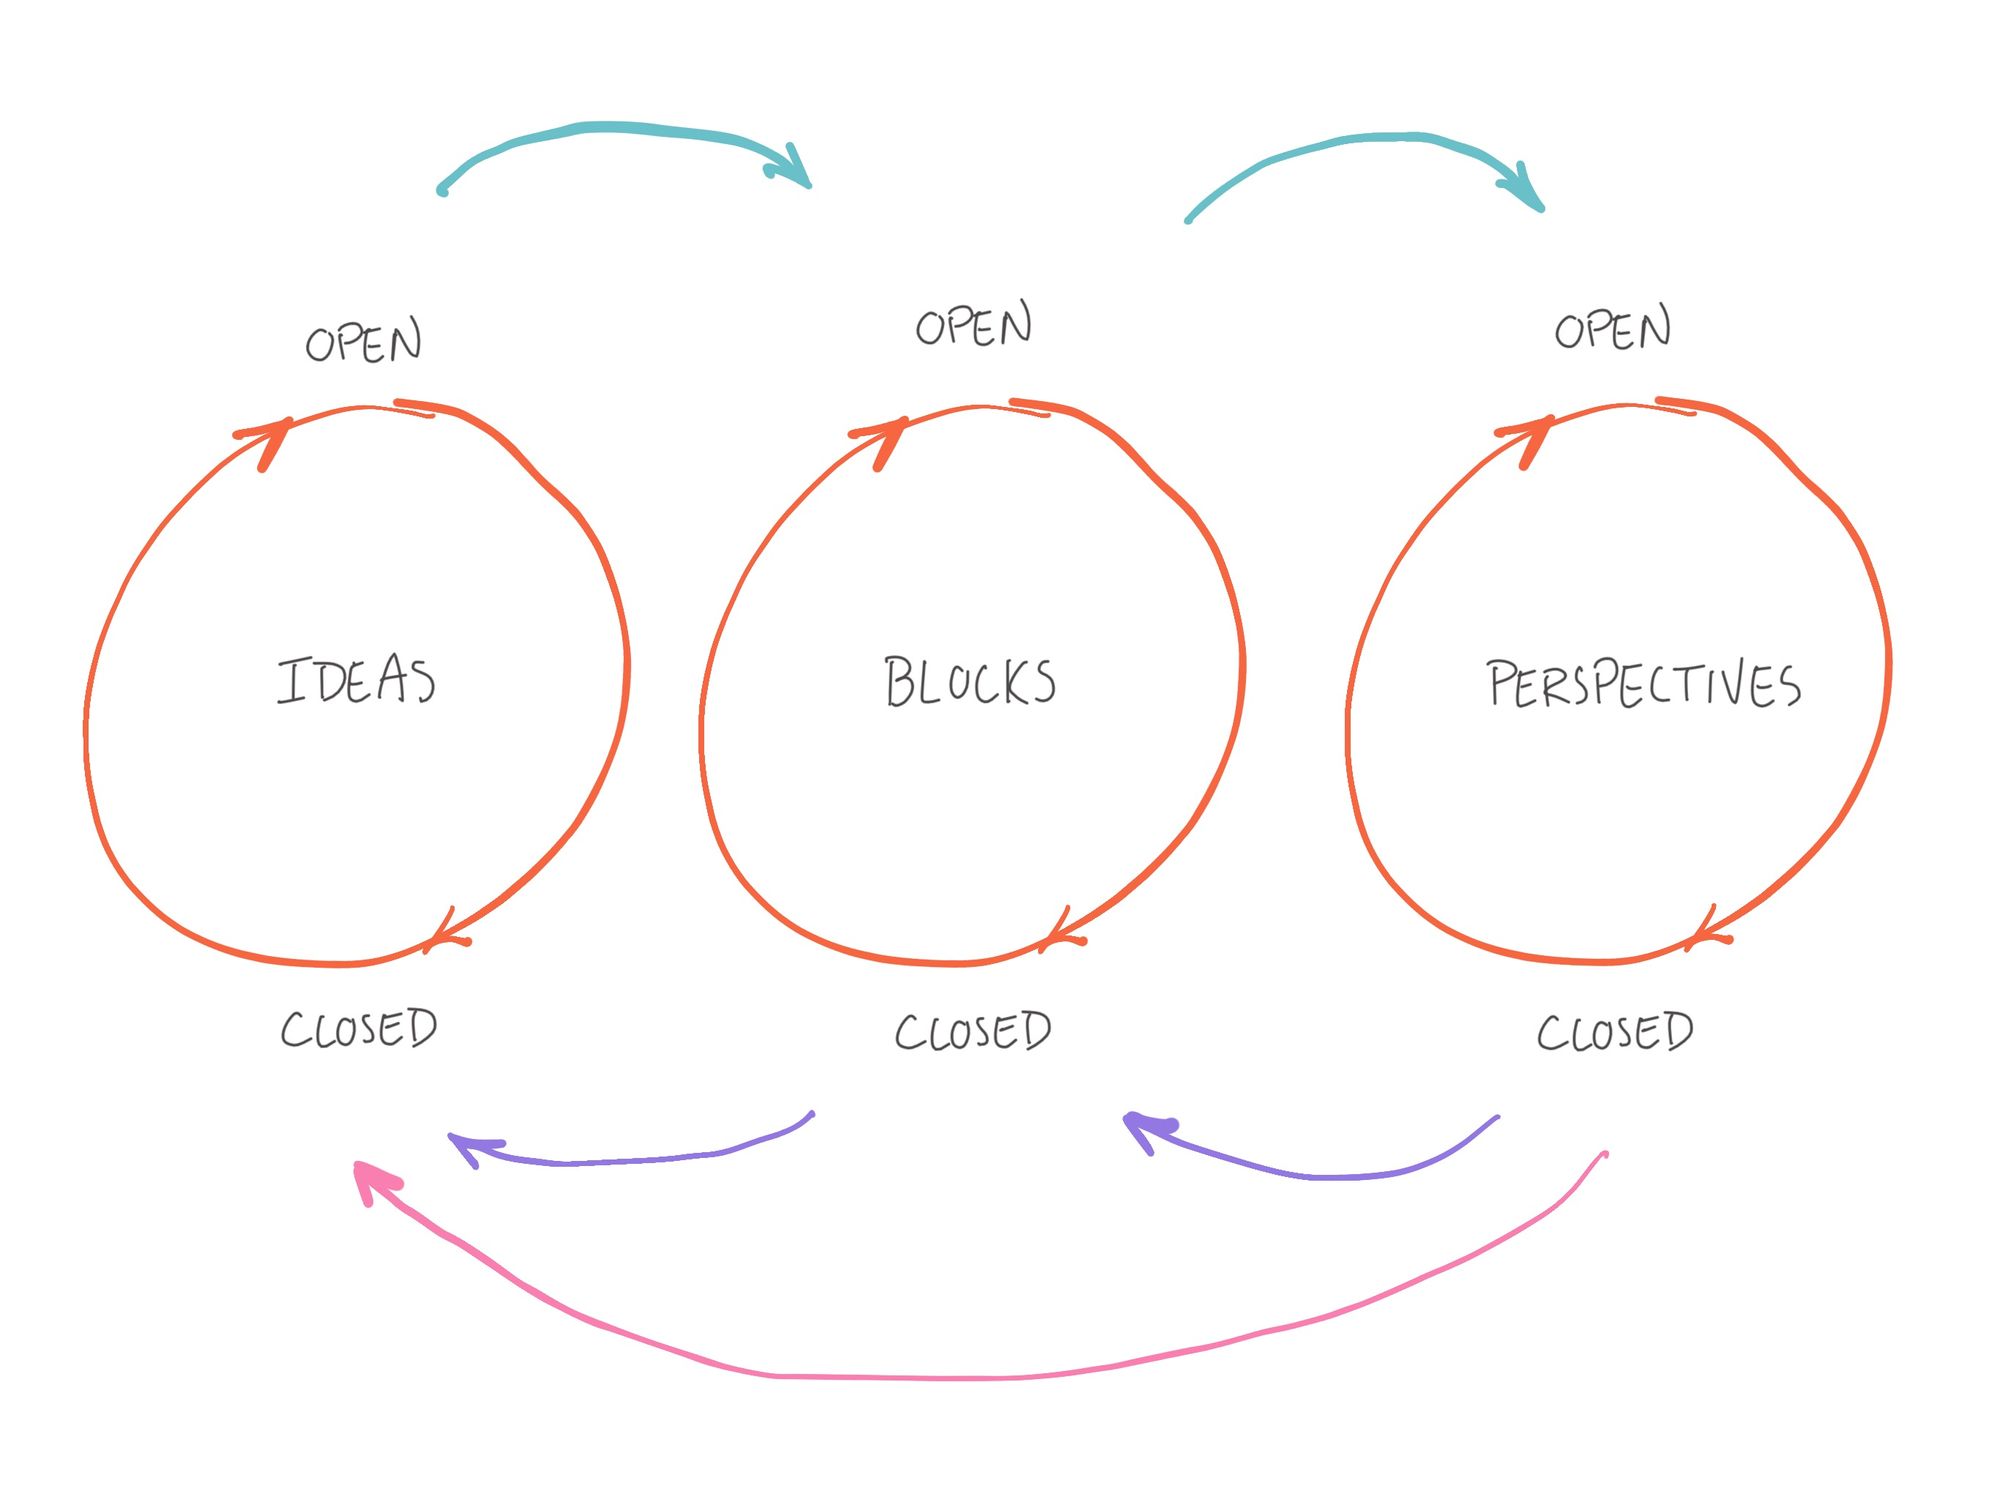
This is probably the most difficult stage if you aren’t used to drawing or working through a design. Luckily, I discovered a wonderful video of John Cleese describing the open and closed modes of the creative process. I have found being able to switch between these two modes is key in my design process. In the open mode, do your best to keep critical thoughts at bay and try not to edit yourself too much. The purpose of being in the open mode is to explore ideas and get them down on paper. It’s the closed mode's job to be critical of those ideas and to filter the poor ideas out. But as John Cleese explains in the video, make sure you are working in the open mode when coming up with ideas. You will find it incredibly difficult to be creative if you are stuck working in the closed mode.
Please note that switching between these two modes is not easy if you are not used to doing it. Be patient with yourself. If a solution is not forthcoming after working on your problem intensely for a period of time, put the work down for a little while and go do something else. Trust me, your brain will continue to work on the problem in the background and will let you know when it has thought of something.
Open Mode: What’s the Problem?
When I set out on a new concept plan, I typically start by creating lines, shapes, and making various notes. I do this because it keeps the work feeling light — I am not at the detailed stage yet and do not want to encumber my mind with those specifics. Instead, think about the problem you are trying to address and come up with as many rough solutions as you can. This will probably take some time. Try to aim for at least three wholly different ideas.
I also figure out where my main perspectives are, whether they are coming from a house, deck, patio, or a bench.
Closed Mode: What Ideas Are Promising?
Once you have your ideas, it is time to switch gears and become your own critic. Put things down for a day or two (minimum) and return to your work with fresh eyes. What immediately jumps out at you as a poor idea, or is impractical or likely too expensive for your budget. Are there parts of one idea that you like that could be combined with another? Impractical ideas can be worked on further to become more feasible, so don’t be too eager to throw things in the garbage immediately.
When I do this step, my mind often wants to spring back into the open mode. If that happens to you, don’t fight it. Just switch back to thinking about possible solutions to your problem. The key, though, is to stop being a critic of your work when you change gears. Otherwise, you risk spending too much time being critical and not enough time coming up with new ideas to address the problem.
On the flip side, you also need to be critical of your own work at some point. Try to be mindful of what mode your brain wants to stay in the most, and make a concerted effort to spend time in the other mode. Again, be patient with yourself and your ideas.
Open Mode: Playing with Blocks
Let’s assume you have an idea that you are excited about and have some preliminary shapes, diagrams, and notes on a page. What’s the next step? More playing!
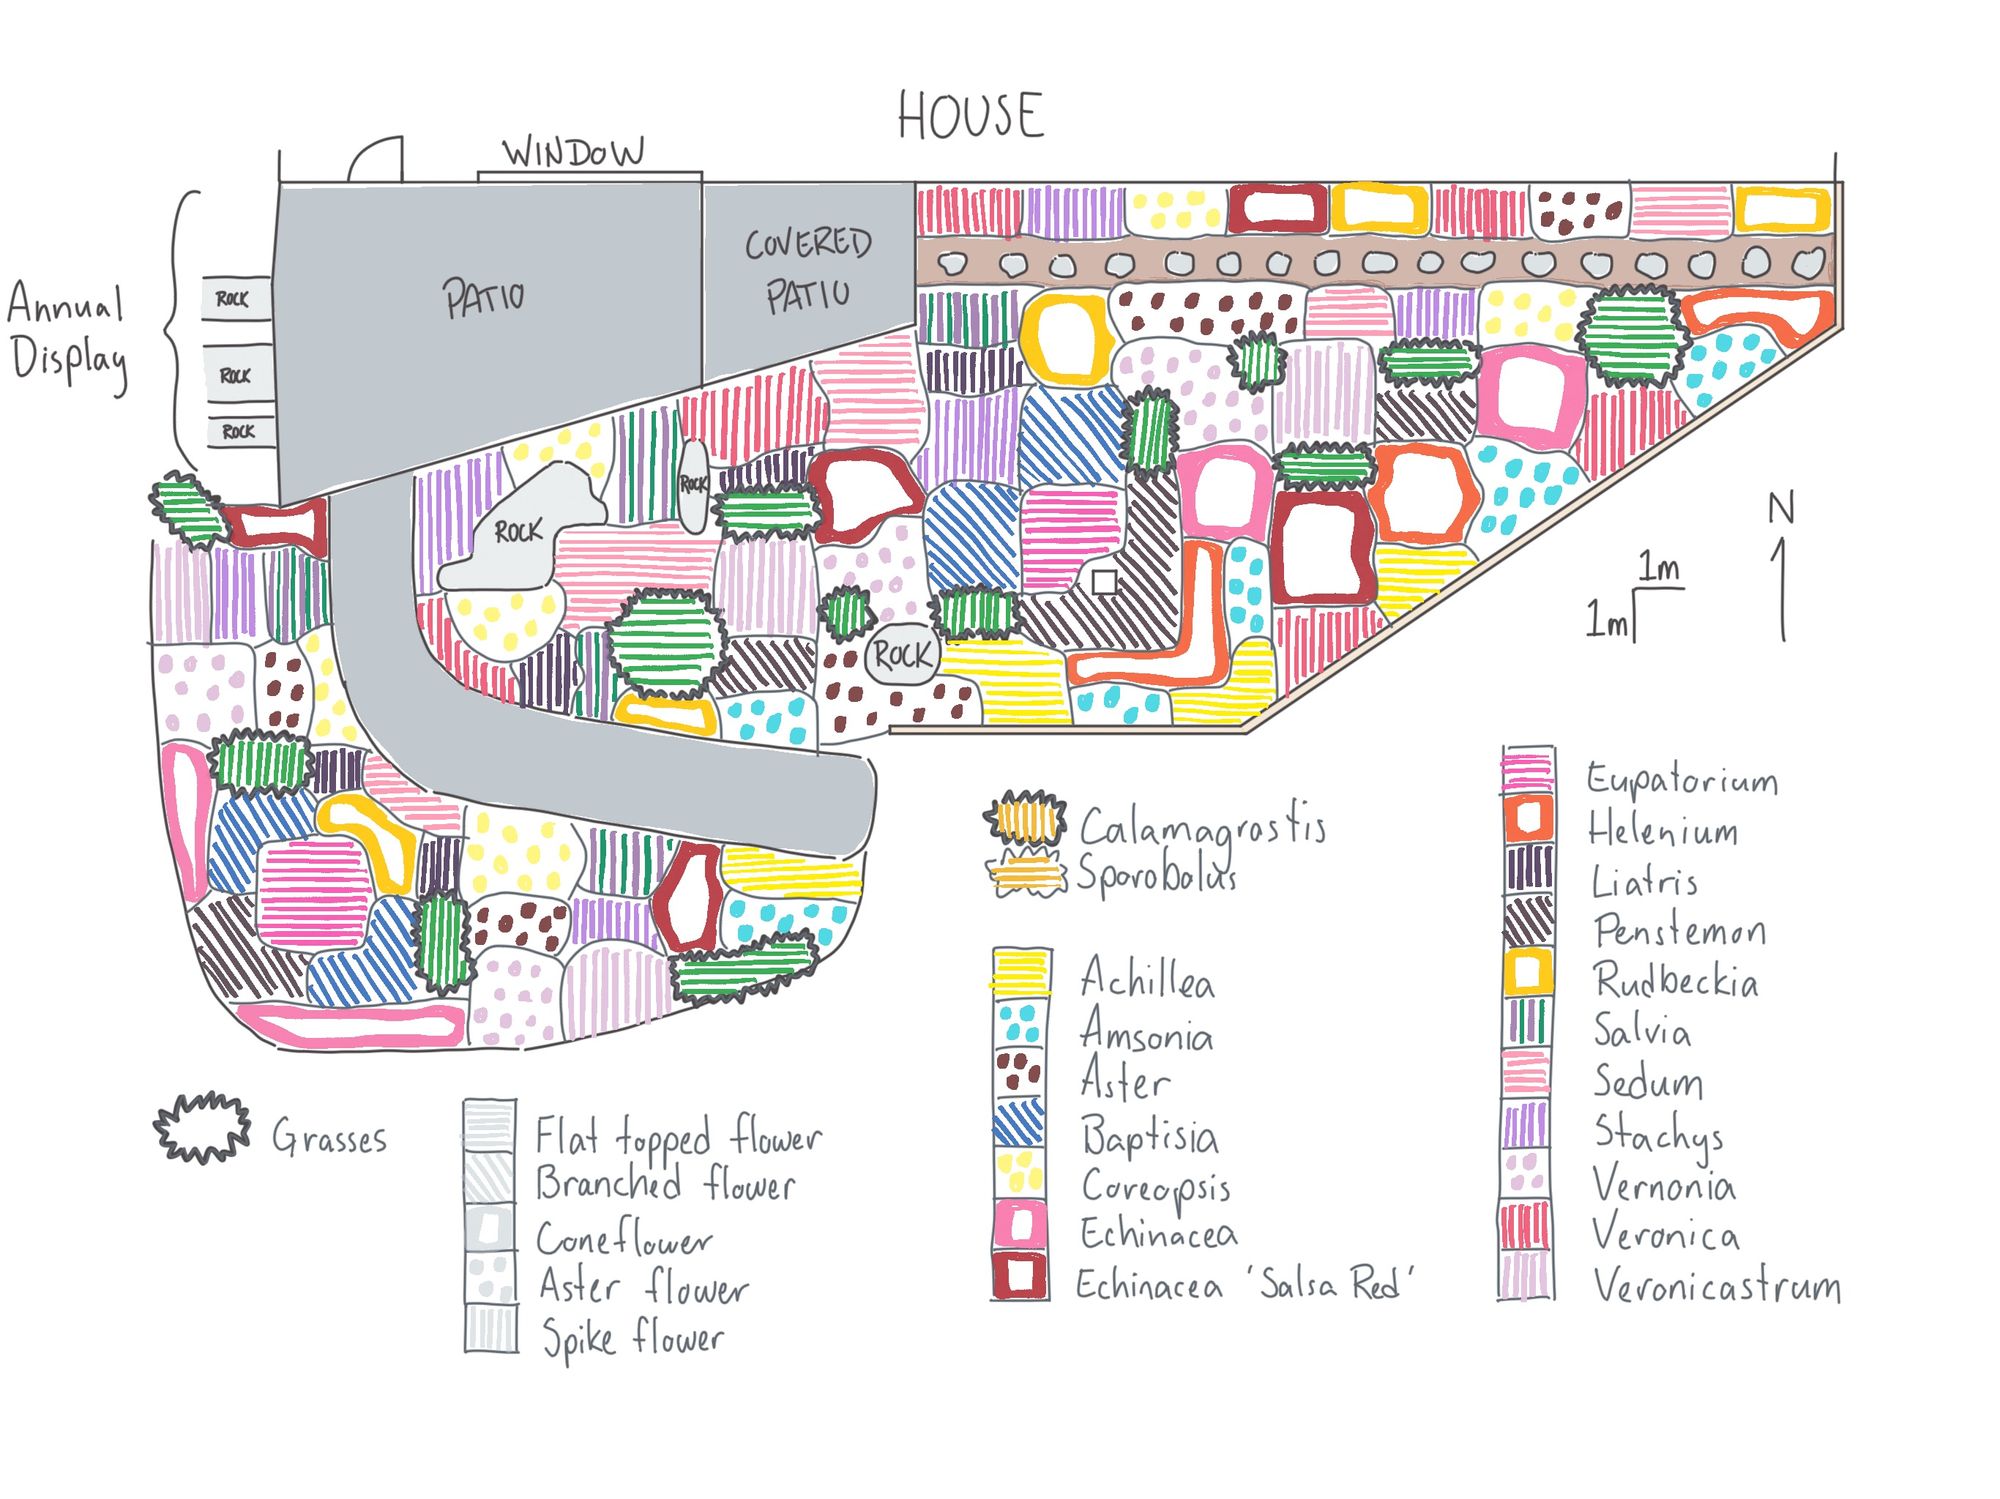
Now we get to incorporate some information from our plant list into our drawings. One of the reasons I like working with grid paper so much is that it helps make this stage more fluid. Instead of getting bogged down with details, we can add a bit more information to our drawings while remaining flexible to new and developing ideas. Essentially, we get to colour in square blocks with colours and symbols (if you want). The colours and symbols you use are up to you. I try to keep the colours I use similar to each plant’s flowers, and also use certain symbols/lines to add another layer of information (typically what kind of flower the plant has). Just remember to make a key for the symbols you use in the corner of your drawing so that you can identify things easily later on.
You can do this all at once, or break things down into more open/closed modes that build in complexity. For example, you could identify groupings of specific plants (like grasses or shrubs) and use abbreviations to identify each group. Then see how things look/feel. If it looks good to you, start a new drawing/layer that adds in perennials (and so on).
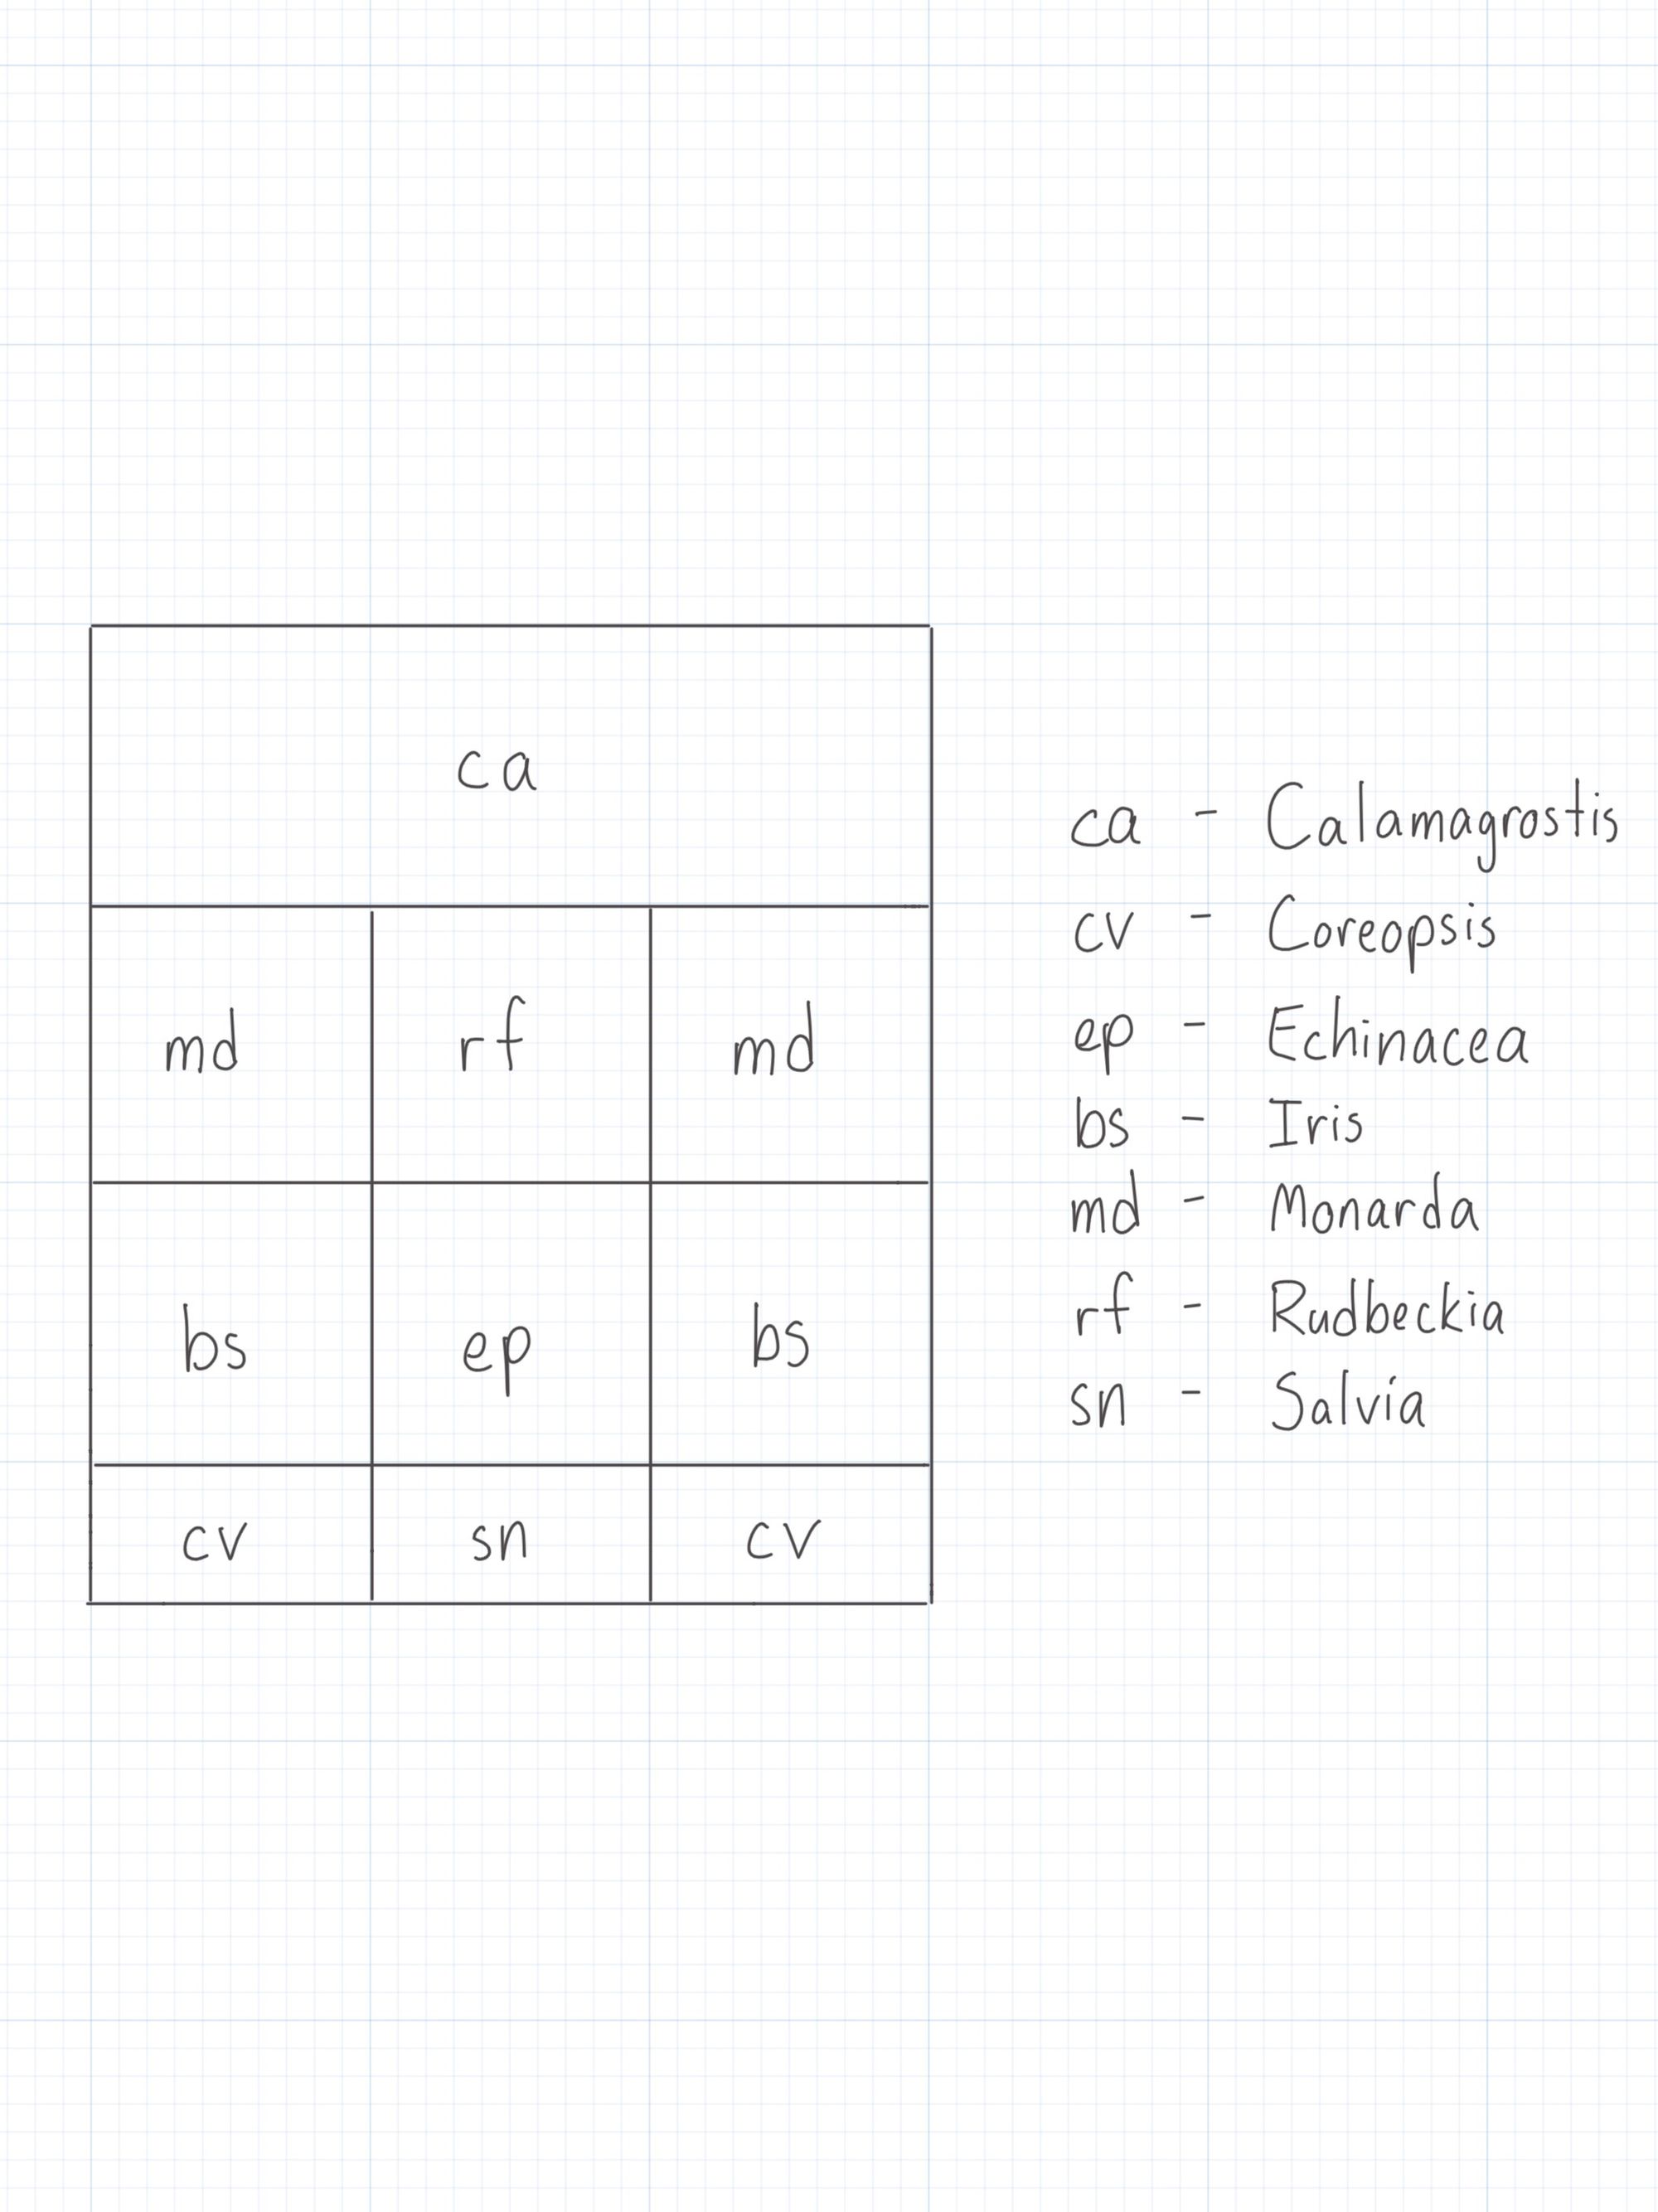
Or you can keep things simple and just add abbreviations to each block so that you can identify them. That’s what I have done in my garden recipes. It’s really up to you and the scale/complexity of your project.
Closed Mode: Seasons
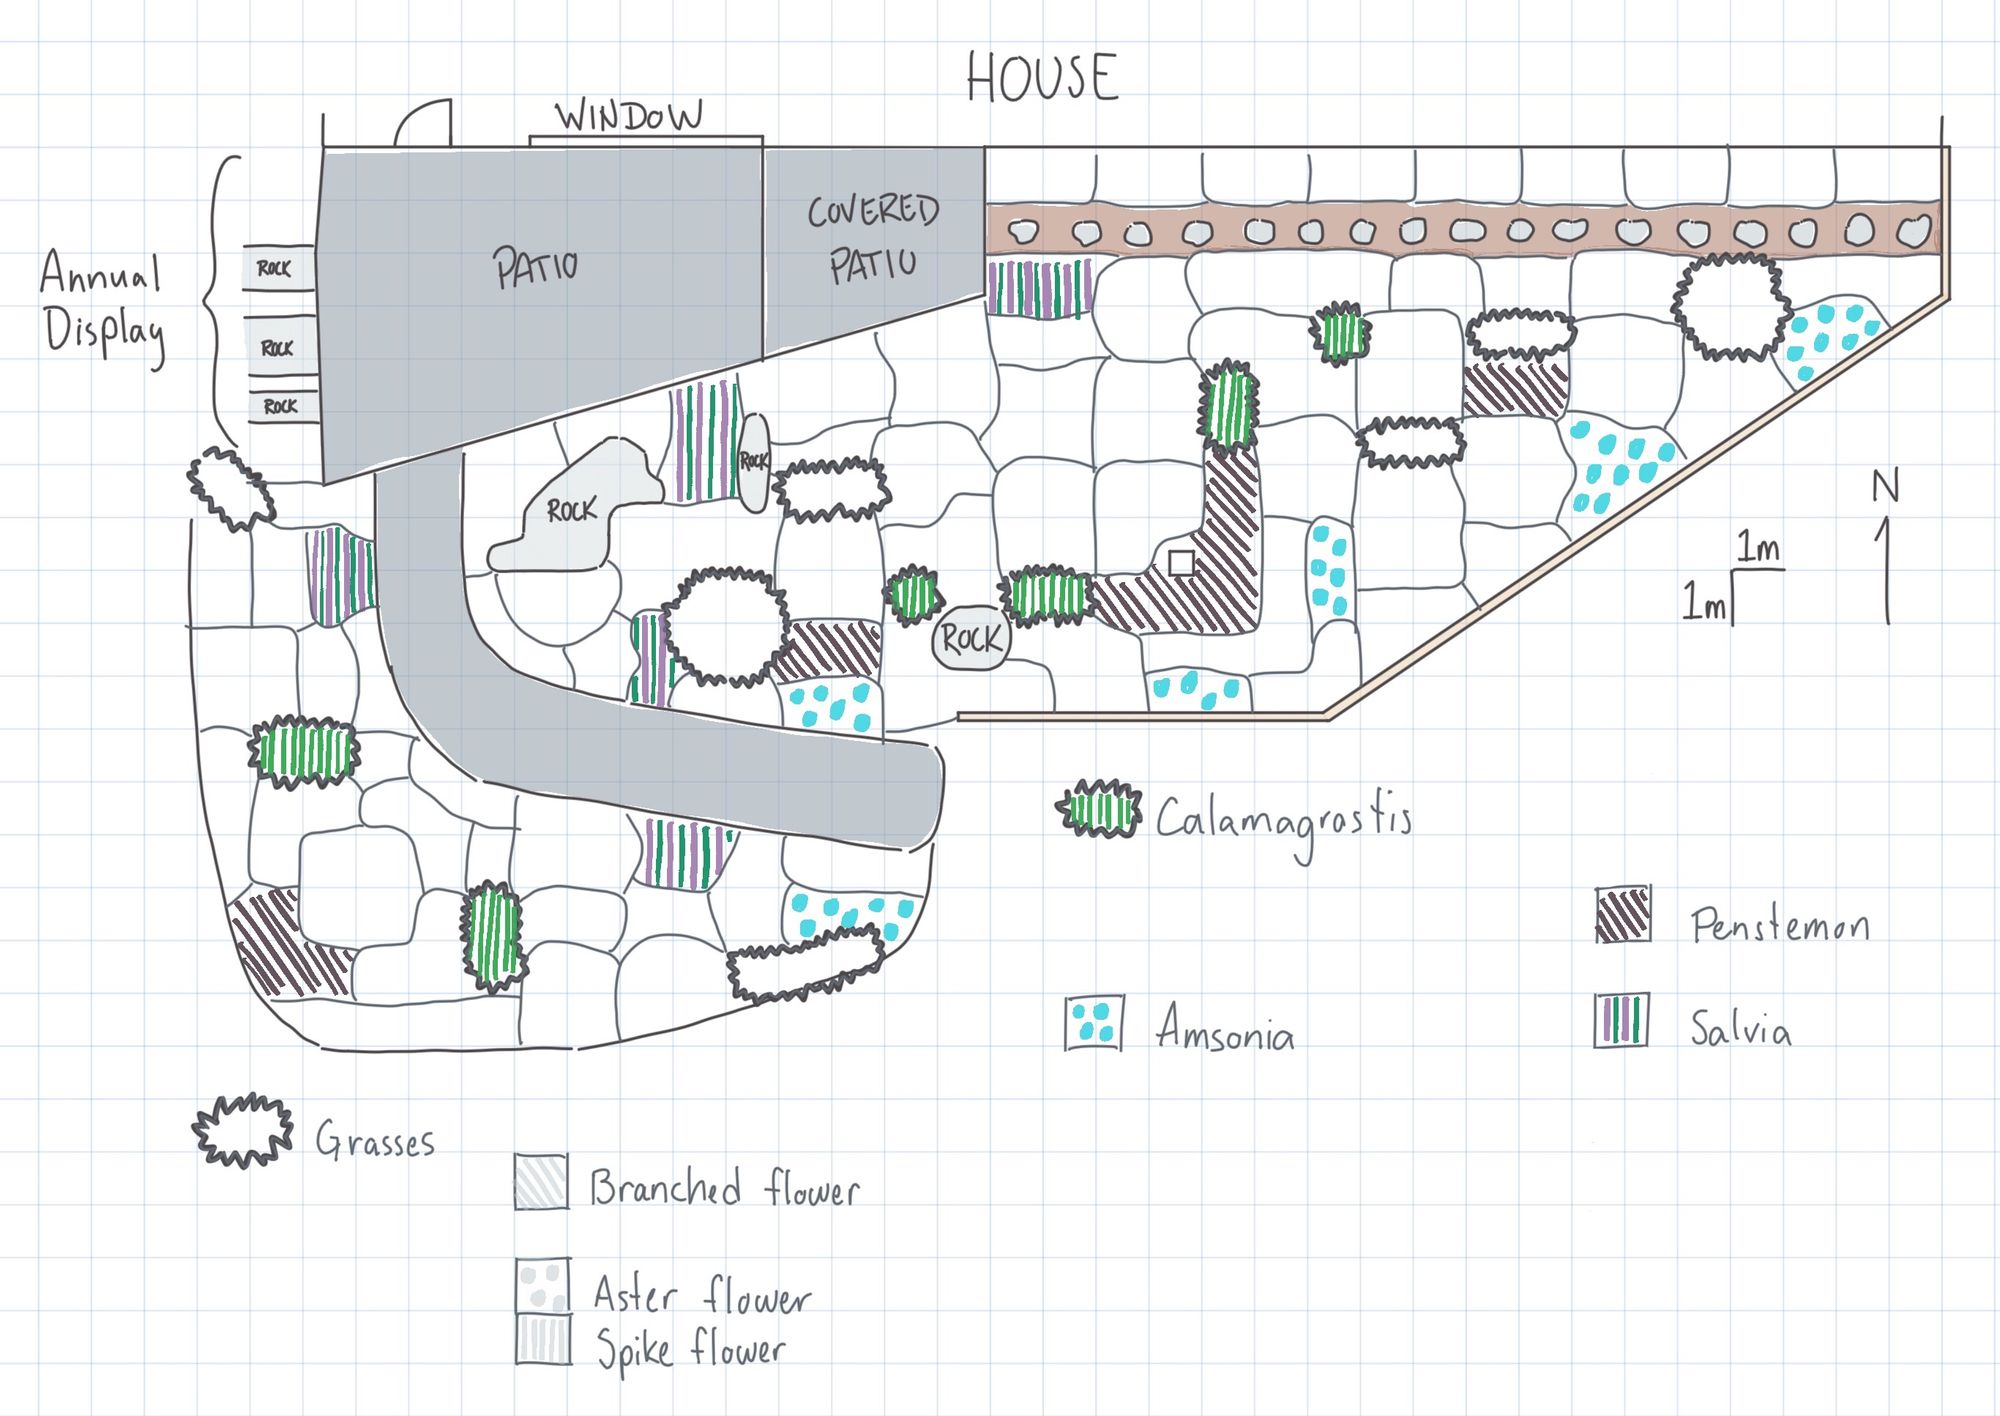
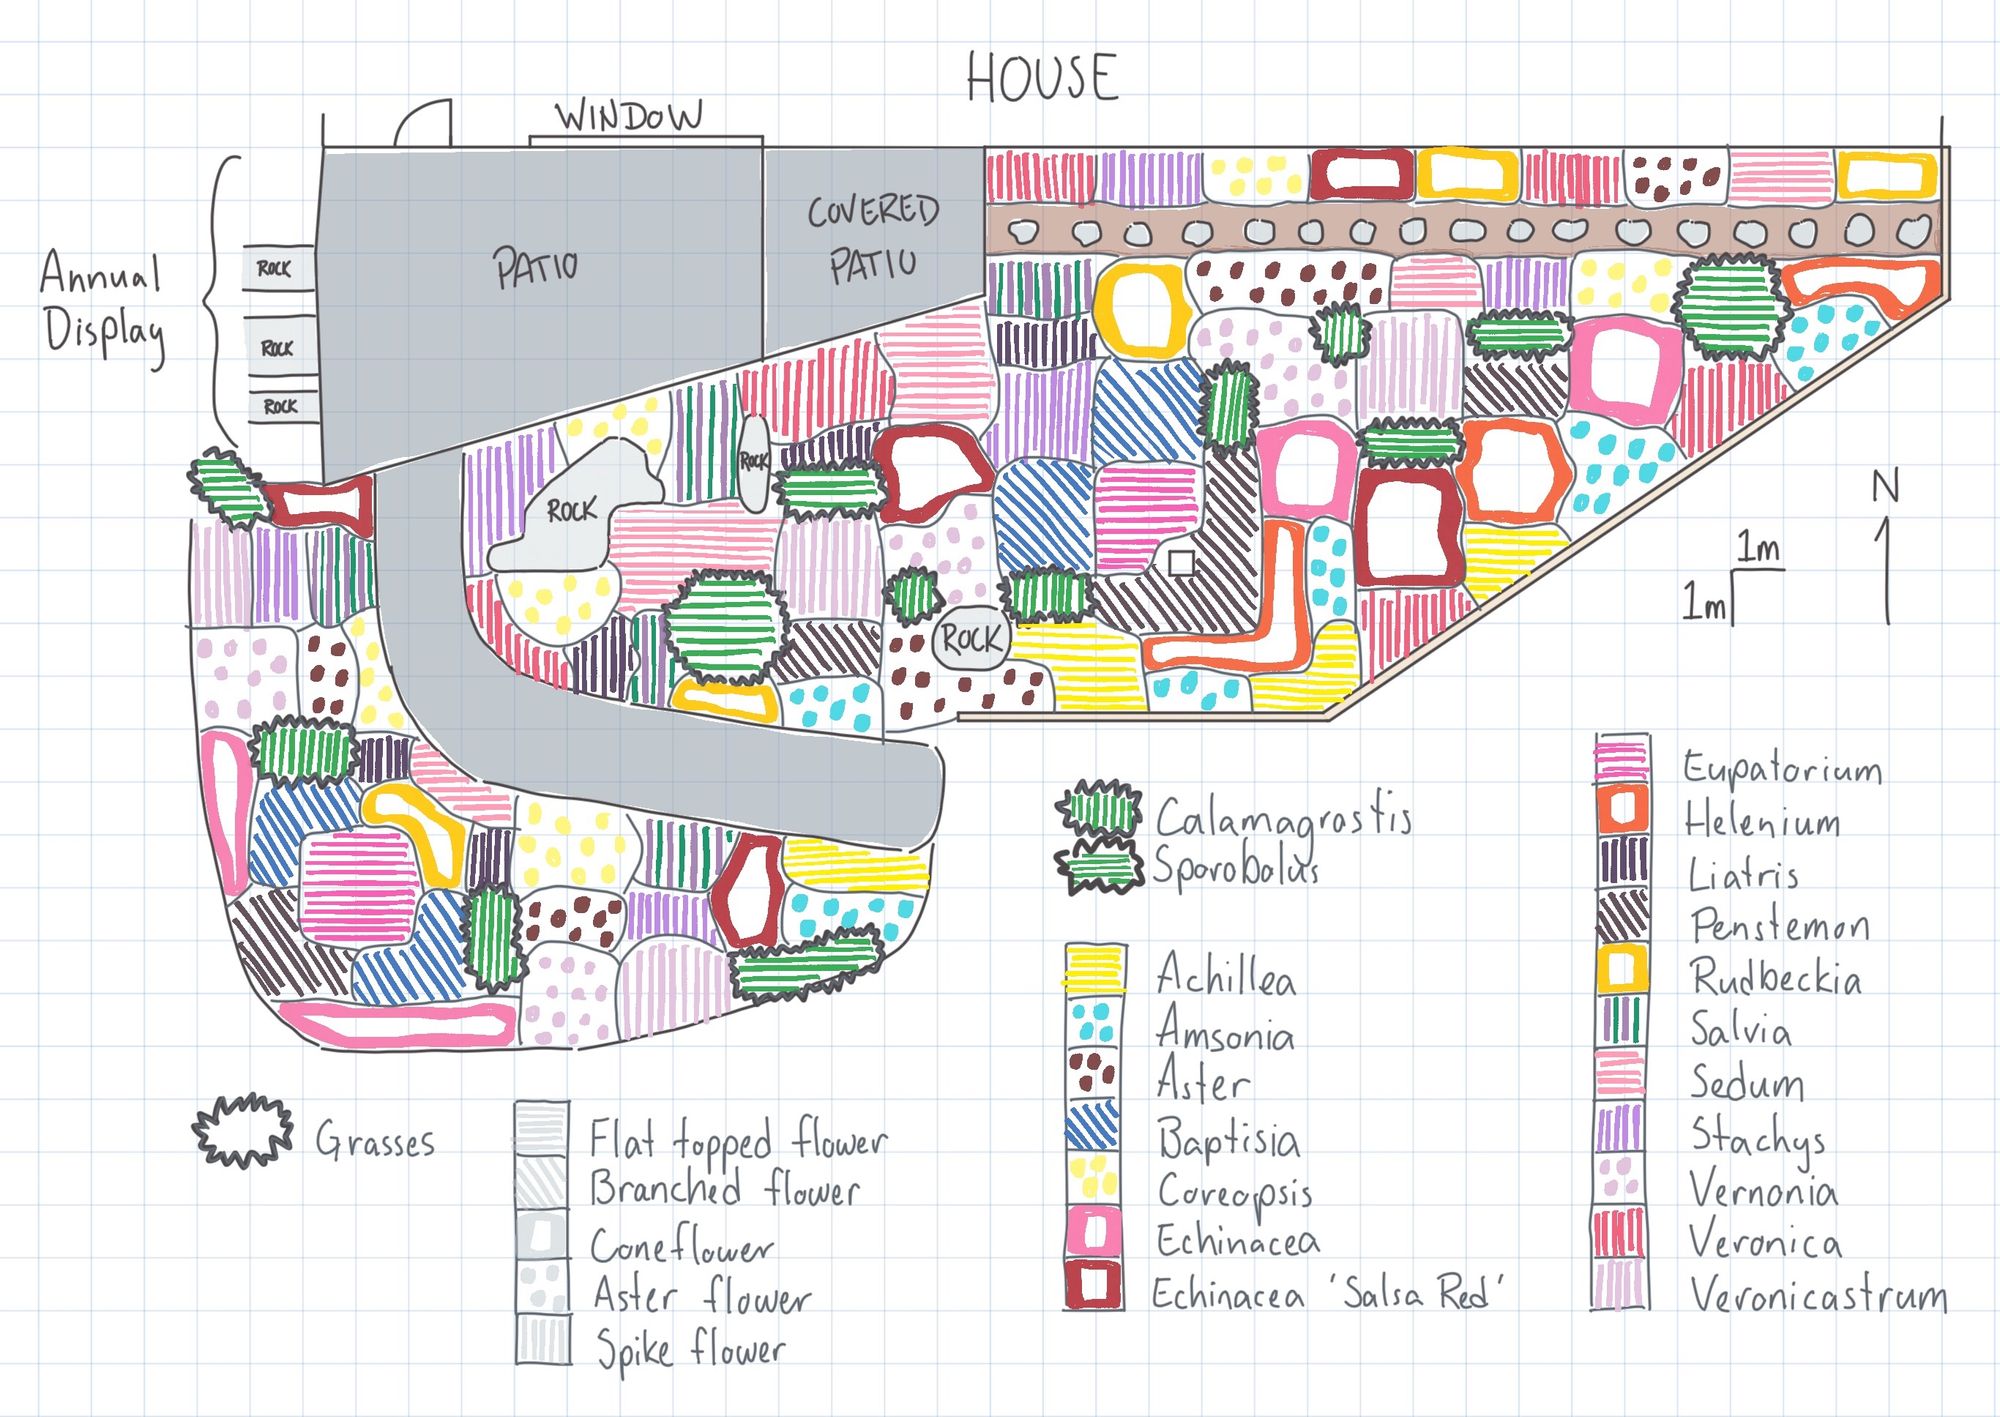
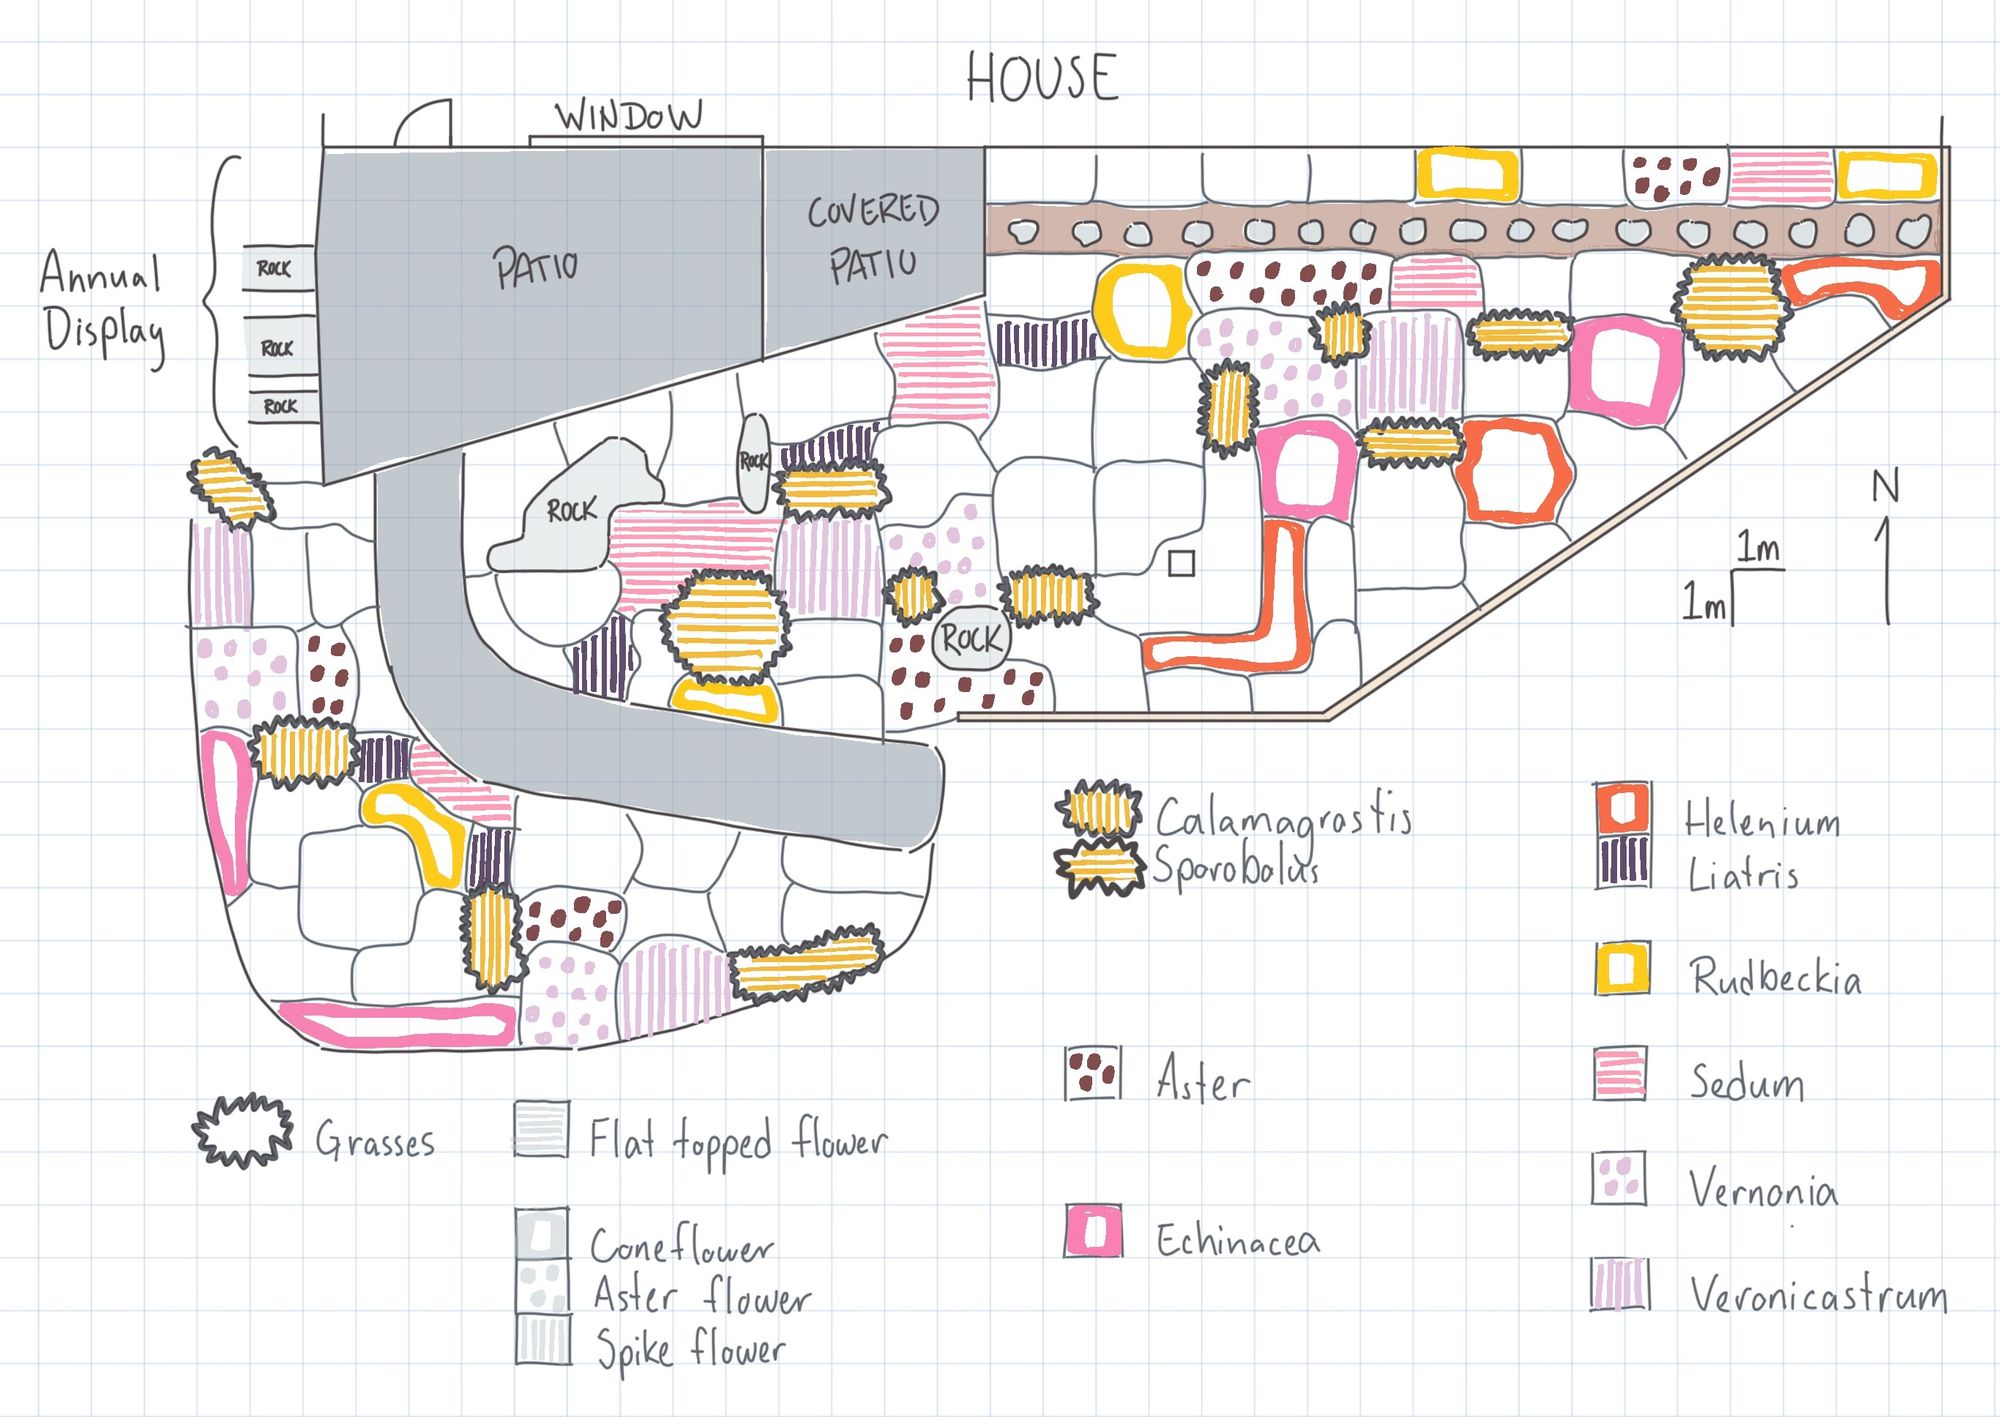
Spring, Summer, and Fall Examples
Once I have an overall drawing done that I am happy with, the next thing to do is to make separate drawings for each season. I like to do this because it really forces me to see what is available in each season. It won’t show you everything, as there is more to plants than just their flowers, but it will give you an idea of when plants are growing, and when they will be at their peak.
Normally, I don’t bother with a winter drawing, as I can tell from my other seasonal drawings what will be interesting when the snow is falling. However, if you haven’t done a garden design before and are working on a larger project, it can be a worthwhile exercise to go through.
If you find that there is something that you missed or don’t like about your drawing, go back a step and try again. If you find that the idea you have been working on won’t address your problem, go back to the very beginning and come up with some new ideas.
Closed Mode: Elevation Drawings
Finally, elevation drawings are my final check at this stage. You don’t have to do this step, but I find it helps with visualizing the heights of each plant and how they look next to their neighbours.

The drawing is fairly easy to put together, too, as you essentially build on your initial drawing. Think about it like going from a bird's-eye perspective to looking at the garden straight on (a 90 degree pivot). Then begin drawing blocks, starting with the plants at the front edge and moving progressively further back.
The key is to only draw in the plants that you can see looking straight on. Obviously, it will be a little different in real life, as your perspective will change when walking on foot. But you may find that some plants are too hidden, or don’t have the same visual weight you thought they would have. If something is off, go back to the open mode and make some changes. Then work your way through the closed modes again to make sure everything is in its place.