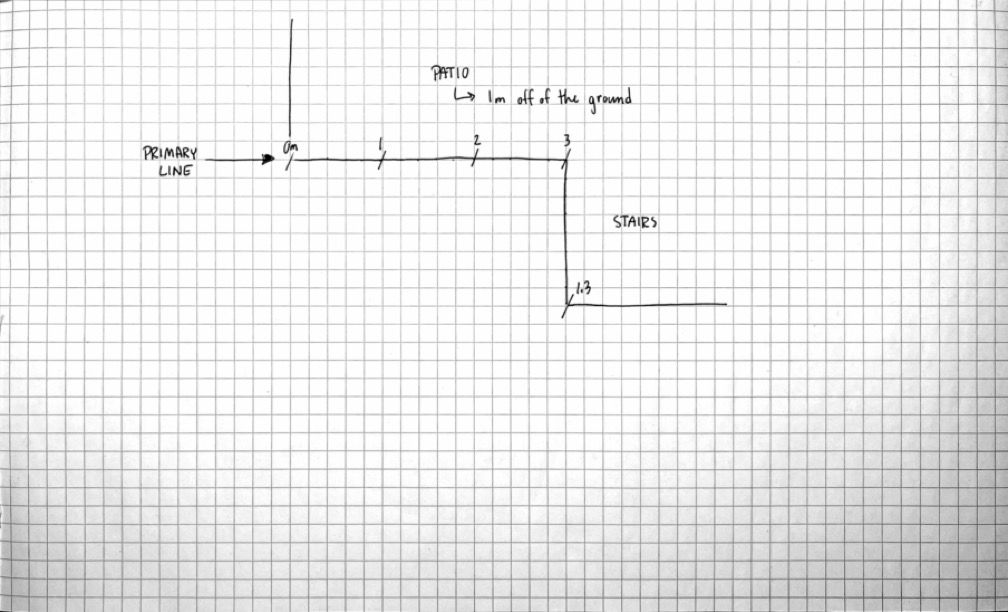
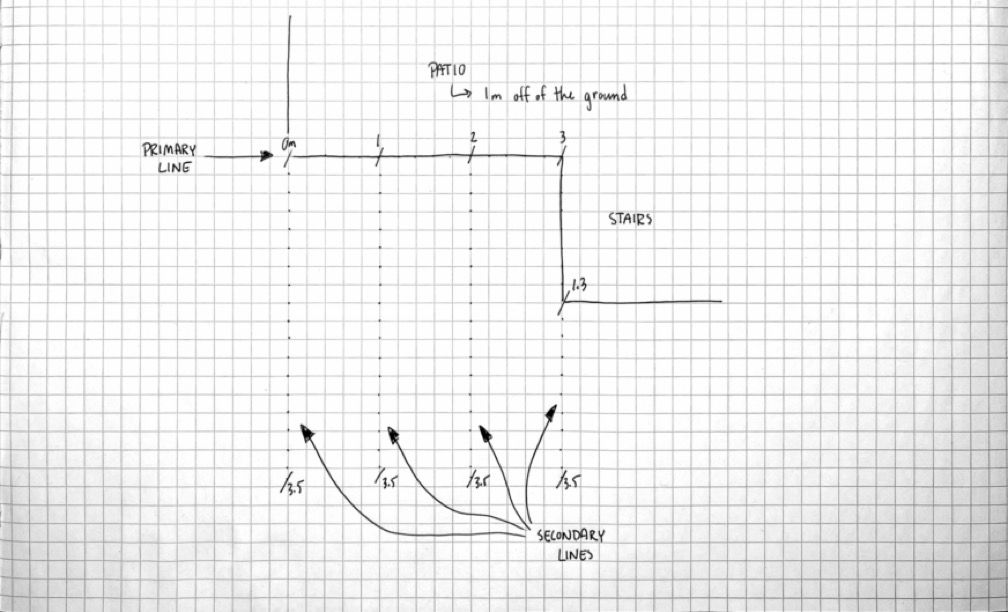
In order to ultimately produce a planting plan, we need to know the shape of the space we are working with and what exists within that space. We have to measure. I typically use graph paper and a pen for this stage, as the drawings don’t have to be completely accurate visually. They just need to have the correct measurements so that you can translate your initial sketch into a proper scaled drawing.
Anchors
The most important step is determining what you anchor will be. This is important because you will need to reproduce your planting plan on the ground when you are ready to implement your design. Knowing what your anchor point is keeps the design grounded to a specific point that can’t be moved or lost. For most garden design projects, this anchor is a corner on the front wall of a house or the edge of a driveway or pathway. Please make note of your anchor on your drawing in some obvious way.
If you are creating a garden that isn’t next to hardscaping or a structure, place a wooden stake (or a series of stakes) in the area you would like to work with. Just make sure you don’t remove them when you are done measuring.
Measuring

Once you have identified your anchor, begin laying out your primary measurement line. I like to use a longer tape measure for this stage, as most garden projects are longer than they are wide. Use what makes sense in your particular case. The 0 mark should be on the anchor point you identified earlier. Once the tape measure is laid out, use marking flags to identify every 1m along the line. If your space is on the larger size, feel free to mark 2m intervals instead.

Collect your tape measure after finishing with the flags (unless you are using more than one) and begin measuring a secondary line, perpendicular to the initial primary line at the 1m intervals. The idea here is to make note of any changes in surface type (ex: existing garden bed to turf, or driveway to turf). You aren’t measuring out the new garden, per se, but instead are focused on identifying what is currently on the site.
If you are working next to a house, pay particular attention to window locations (their heights from the ground too), as well as any utilities that are coming from the house. If you are working in your yard, make note of any existing hardscaping, decks/patios, benches, installed sprinkler heads or existing trees/shrubs/perennials and their size.
Locates
At this stage you should also call to get locates done for buried utilities. There is no point getting to the implementation stage and finding out that you have to make dramatic changes to your design because you didn’t realize there were utilities below where you wanted to work.
Look at Your Soil
While you are poking around your site, take the time to use a shovel to dig around in various areas where you would like to put your new garden (try to dig at least a foot into the ground). What kind of soil is present? Sand, clay, or is it a mixture of the two? Are there lots of little rocks or solid rock underneath a small amount of top soil?
How deep does the soil go? Does the soil type change as you dig? Is there standing water after you dig the hole?
The purpose for doing this is to determine how much “good” soil you are working with. When it comes to install new plants, you want to make sure there is enough nutritious soil there for the plants to grow into. That means having at least 6 inches of soil to plant perennials into (9 or 12 inches is better). If you are planting trees and shrubs, aim for 12 - 18 inches of soil depending on the size of the material you are working with (think pot / root ball size).